|
One of the questions I am often asked - especially by former students setting out to write their own drill for the first time - is: "How do I write for my band when it's this small?" After good-naturedly reminding them that we discussed this very issue in our Marching Band Procedures courses "back in the day," I usually chat with them about strategies that have worked for me when designing for smaller, younger, or less experienced groups.
Over the years, I’ve written drill for ensembles as large as 400 members and as small as 26. Both ends of that spectrum come with their own unique challenges and rewards, but designing for smaller groups requires a completely different mindset, one that balances visual impact, musicality, and achievable staging for limited numbers. Since drill-writing season is fast approaching, I thought I’d share a few insights and tips for those of you writing drill for small marching bands. Whether you’re a first-timer or a seasoned designer working with a newer program, these ideas should help get the creative gears turning and help anyone who might be struggling to find a style that works with their own small/young groups. And hey, if you’d rather not go it alone, I’m always available to write your drill for you. Check out my portfolio and send me a message. I'll be happy to chat with you about writing your marching band's drill this season. Now, let’s get into the tips for designing drill for smaller or younger bands… The Basics of Drill Design
Simplicity Wins
This one took me a long time to really learn: Keep. It. Simple. Not every set has to be flashy or complex to make an impact. In fact, some of the most effective drill I have written uses simplicity as a strength. Clean, purposeful staging often lands harder than constant movement ever could. When you are writing for a small or developing band, simplicity isn't just a stylistic choice, it's a strategic one. Giving your students a few moments of less demanding movement provides visual and musical “breathers” that help with performance quality. Not every set needs to be a big reveal. Sometimes, the smartest design move is to keep things readable, intentional, and (most importantly) achievable. Your band will execute better, and your audience will appreciate the clarity. Shape and Form Choosing the right types of forms can make or break your visual program, especially when you are writing for a small band. Each style of form carries its own strengths, challenges, and visual impact. Here’s a breakdown of the major types and how to use them effectively:
With some of those basics of drill design out of the way, let's talk about issues encountered when writing specifically for smaller or younger bands. Writing Specifics for Smaller Bands
GroupThink
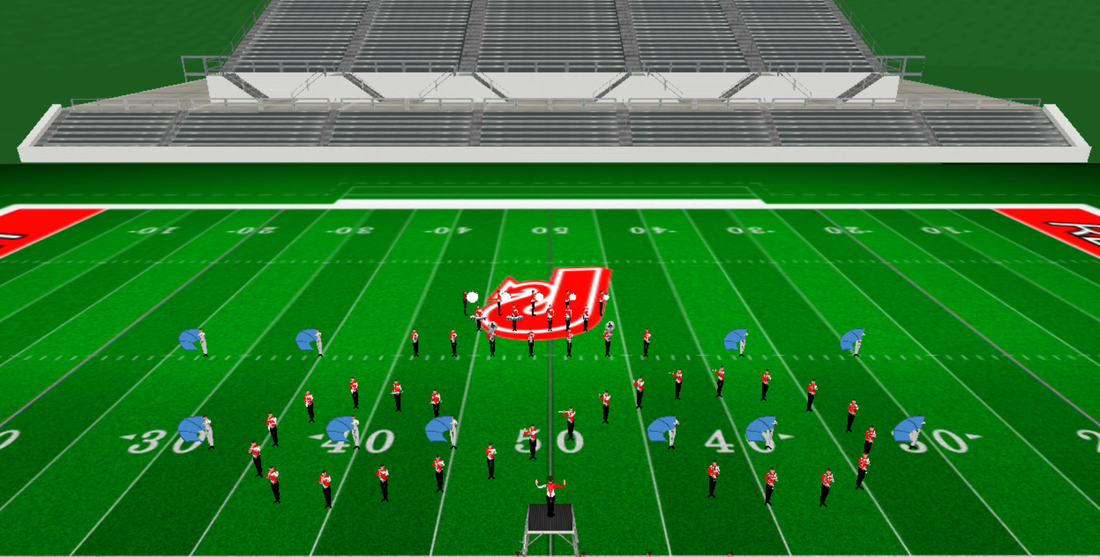
When you are designing drill for a smaller ensemble, section cohesion is everything. Keeping sections together - winds, percussion, and color guard - helps reinforce musical confidence and visual clarity. Even within those groups, keeping similar instruments close can make a noticeable difference, both musically and visually. Yes, we all know to keep high brass near high brass, low brass near low brass...but don’t stop there. If you are familiar with the score (and you should be), you can group instruments that play similar musical roles, even if they aren't technically in the same section. For example, you can combine mellophones with alto saxophones, or low brass with tenor saxes, or trumpets with piccolos/flutes/clarinets if they share similar musical material at any given point. When instruments playing the same material are staged near each other, you boost ensemble confidence and clean up the sound. Plus, it gives you a more visually homogenous look, which is always a win for small bands trying to maximize their on-field presence. Careful drill writing that reinforces the score? That's where small bands can really shine. The Power Zone If there's one drill design principle that matters most for smaller or less experienced bands, it’s this: Stay in the (Power) Zone. Top-tier BOA bands and DCI corps can spread coast-to-coast across the field and still deliver musical impact, ensemble cohesion, and clean visuals. Smaller groups? Not so much. The wider you spread them, the more you risk losing projection, clarity, and control. The Power Zone (roughly the middle 30 yards of the field, centered around the front hash and the 50-yard line) is your best friend. It's where your band will sound fullest, stay together most easily, and connect visually with the audience. Pulling too far outside this zone usually results in watered-down sound and shaky ensemble timing. Don't mistake the “power zone” for a “boring box.” A creative drill designer can still work plenty of magic within this area. You can create dynamic staging, layered impact points, and strong visual moments, all while keeping the band positioned for success. Plus, by keeping performers in the audience's primary sight lines, your best moments won't get lost in the corners of the field. It's all about doing more with less, and making sure your band always plays (and looks) bigger than it is. 
The Power Zone
Intervals
When designing for a small band, interval size matters more than you might think. Too tight, and your band looks cramped, too wide, and you risk losing musical cohesion. So what's the magic number? Three. 2-step intervals often make the group look smaller than it actually is. 2-step is visually compact, but not exactly impressive from the stands. 4-step intervals can make your band look larger, but can spread your winds too far apart, especially in curvilinear or symmetrical forms. That often leads to phasing, lack of ensemble confidence, and weaker musical impact. 3-step intervals hit the sweet spot. They give your drill a more expansive, open look while keeping your players close enough to stay together musically. This interval works wonderfully in curvilinear forms, where flow and spacing are key. It offers the best of both worlds: a bigger visual footprint without sacrificing cohesion (or power). In short? If you want your small band to look and sound stronger, 3-step interval spacing is the way to go. You can experiment with using other intervals: I've used a 2.5-step interval in the past, to mixed results. Check out the examples below:
While 3-step intervals are great for curvilinear forms and keeping smaller bands tight without looking cramped, they don't work quite as well in geometric shapes or traditional fronts. Why? Simple: they break the natural flow of the “On, 2 Off, or In Between” (O2OIB) alignment method that we've taught students forever. This simple spacing system has made it easy for decades of performers to find their place on the standard 8-to-5 grid, and 3-step intervals throw that off just enough to cause problems in fronts and precise forms.
Instead, when writing geometric shapes, fronts, or linear forms, go with 2-step intervals for tight, powerful formations that maintain cohesion, or 4-step intervals for broader coverage and a more expansive visual look (provided it does not spread your band too far apart). Both of these options align naturally with the 8-to-5 grid, making it easier for students to clean and easier for designers to build around. As mentioned earlier, block formations can pack a punch. Even a simple block can convey message and meaning. But your blocks will have more impact if they are "windowed." In a standard block (for example, 4-step spacing left-right and front-back), you run the risk of looking smaller due to the negative space created between columns. You also have the issue of directional brass instruments playing directly into the back of the person that is 4 steps in front of them (an even bigger issue for trombone players if your block is smaller than 4-step intervals). With windowed blocks, each row is offset, allowing all performers to be visible, helping project the sound without any obstructions (i.e., every spot will have more free space in front of them), and making the group look larger by visually filling the negative space. The offset rows create depth and visual interest in a way that the standard block does not. See the images below for an example.
The Color Guard
If you have a small marching band, you probably have a small color guard. And if you are working with a small color guard, you have probably faced the temptation to spread them across the field to make them look bigger. In my experience, that is usually a mistake. If your guard has fewer than 12 members, keep them together. Splitting a group of eight guard members into two groups of 4 on either side of the field might seem balanced, but it severely weakens their visual impact. Their strength lies in motion, color, and ensemble effect, and that is amplified when they move as one. A unified color guard enhances clarity, power, and contributes more significantly to the visual package, especially in small-band settings. One of the most effective ways to feature your guard is to integrate them into the band itself (especially in blocks). It adds visual interest and gives the impression of a larger, more coordinated ensemble. Although there are obvious size and ability level differences, think of the moment in the 1993 Phantom Regiment show when the guard pops out from behind the horn players in Fire of Eternal Glory. How could you do something similar with your guard? Moments like this are simple, but highly dramatic and visually unforgettable. Of course, you need always be mindful of intervals with guard staging. Depending on the choreography, it is always advisable to keep the guard at a minimum 6-step interval, with 7- or 8-step intervals (or larger) being better for complex choreography. All the World's a Stage
A football field is a massive stage. Large university and high school marching bands make that stage appear smaller through sheer size. Smaller bands operate at a disadvantage in this particular area, but...what can we do about it? Luckily, there is no need to reinvent the wheel. Bands of all sizes have been experimenting with redefining the field boundaries for decades.
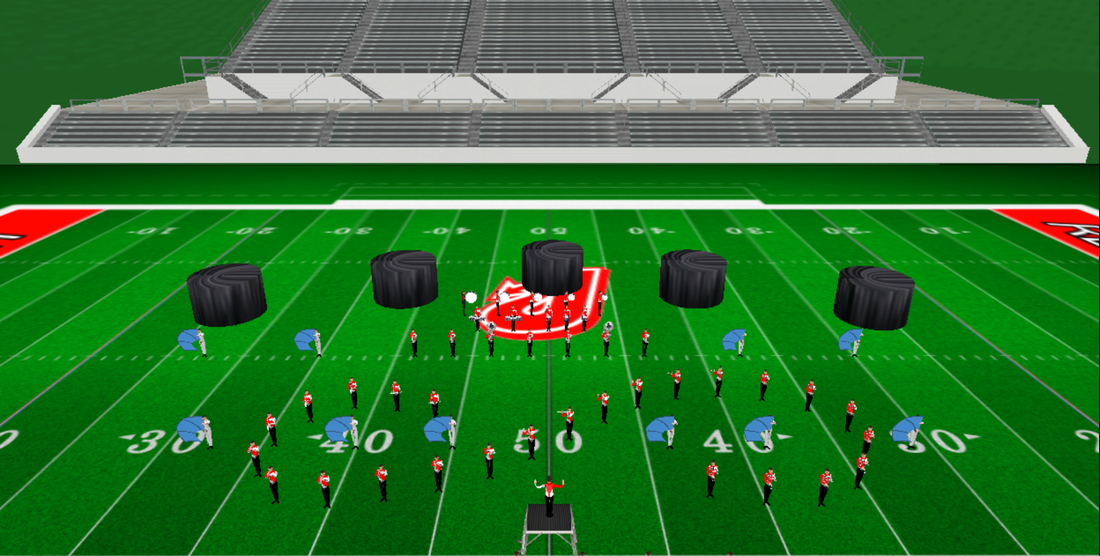
One of the best ways to "shrink" the field and make your band seem larger in the process is to use props or other backdrop devices to help focus the audience's attention on the perceived field, instead of the actual field dimensions. This creates visual boundaries that frame your band, and reduces negative space. Check out the two examples below. Even simple props like the ones pictured on the right can help to reduce the field and make the ensemble look bigger.
Cutting off the Field
Jackson Academy from Mississippi has been doing this for 30+ years. As far back as I can remember, they have had successful marching bands (especially relative to the size of the institution), and they were one of the earliest bands to show the power of making the field look smaller.
Jackson Academy, 2011
However, keep in mind: Props can be difficult and finicky. If you are going to use them to help change the field boundaries, make sure they look polished (well-painted, not held together by duct tape, etc.), make sure they are easily transported and can be set up/broken down in an easy manner that doesn't take long, and make sure they can withstand outdoor conditions. Especially wind. I'm sure every band director and drill designer has horror stories they can relate about props that have made sudden, wind-assisted dashes for "freedom."
Even simple elements like sideline banners, wing props, or minimalist backdrops can create a more intimate, focused stage. The key is making them intentional and functional. Props that are fully integrated with your show theme allows for your performers to interact with them more organically throughout the show. Artistry in Motion
At the end of the day, you are still writing drill that comes to life only when in motion. When writing for small or developing bands, that often means striking a balance between musical integrity and visual energy. Here are a few techniques that can help maximize your show’s effect, without burning out your performers.
Counter-Motion One of the easiest ways to make your show feel more dynamic, without increasing tempo or step size, is to use counter-motion. When different sections move in opposing directions, it creates the illusion of speed and complexity, even at a moderate temp, standard 8-to-5 pace. This technique can simulate higher velocity and inject excitement and energy into transitions and impact moments. It can also make small bands look larger by filling more of the field visually, even if overall movement is limited. Staggering Responsibilities You don't need to have everyone moving all of the time. Instead of making everyone march during every phrase, stage the band's movement in layers. When one group is playing a complex or expressive line, let them hold position while others move around them. This adds visual contrast, without a sacrifice in sound. You know who has absolutely MASTERED this, even though they could probably jazz run at 180bpm and still play most of their music flawlessly? The Blue Devils. Go watch any of their shows from the past several decades, and you'll see plenty of examples of intelligent drill design and staging, especially the staggering of musical and visual responsibilities. This has the added benefit of helping prevent fatigue/giving certain sections of the ensemble a break from movement. Size Matters Large step sizes and complex, intricate musical passages simply do not mix. You want to make sure your members are at their most confident during their most difficult or expressive musical moments. Having them moving backwards at a 6-to-5, or doing jazz runs of 4-to-5 across the field, completely upends that maxim. Save the larger step sizes for percussion features, or for sections that accompany the main melodic motives. This will result in a more confident and polished musical AND visual performance.
What say you? Did I miss any obvious design tips for smaller or less-experience groups? Feel free to chime in with tips or tricks that have worked for you.
And as mentioned earlier, check out my services if you find yourself in need of a drill writer or music arranger for your marching band this season (or check out my existing stock of marching band music arrangements). Introduction
You’ve just secured a great high school teaching job, and are now officially a band director. You set up your band camp schedules, you assign instruments, you buy all the music, and your drill designer has sent you the opener drill. You are ready for greatness! Until you step outside to the rehearsal field and realise that no one has bothered to line it over the summer months, and you’re staring at a big empty field of green grass. What do you do now?
Don’t fret. After familiarizing yourself with this guide, you will never be without the knowledge of how to line a field – any field – for use by your marching band, and your field will never look like this: 
"Oops"
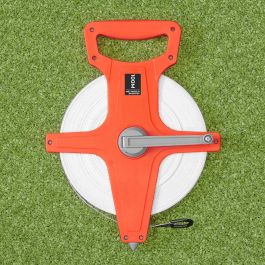
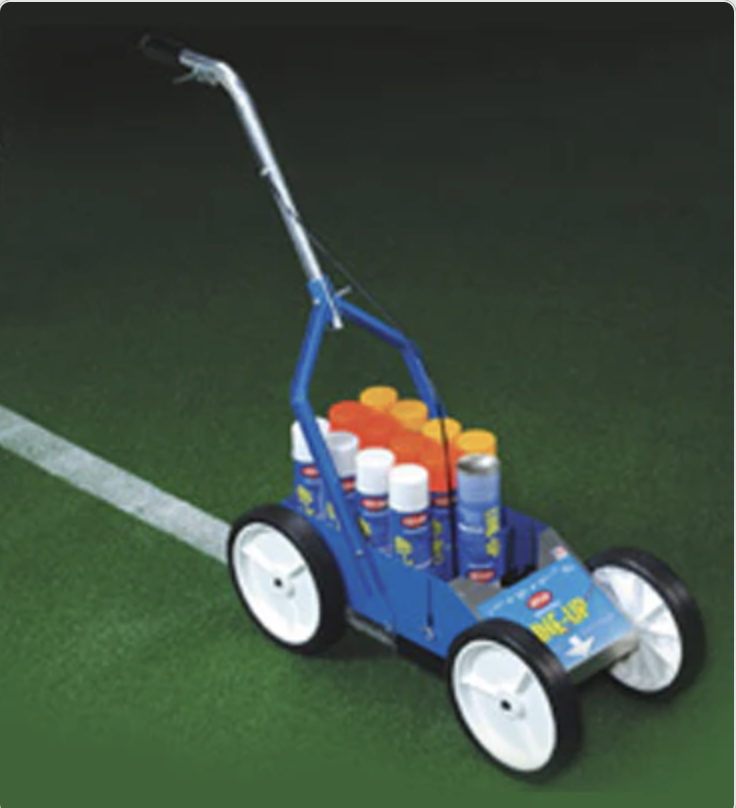
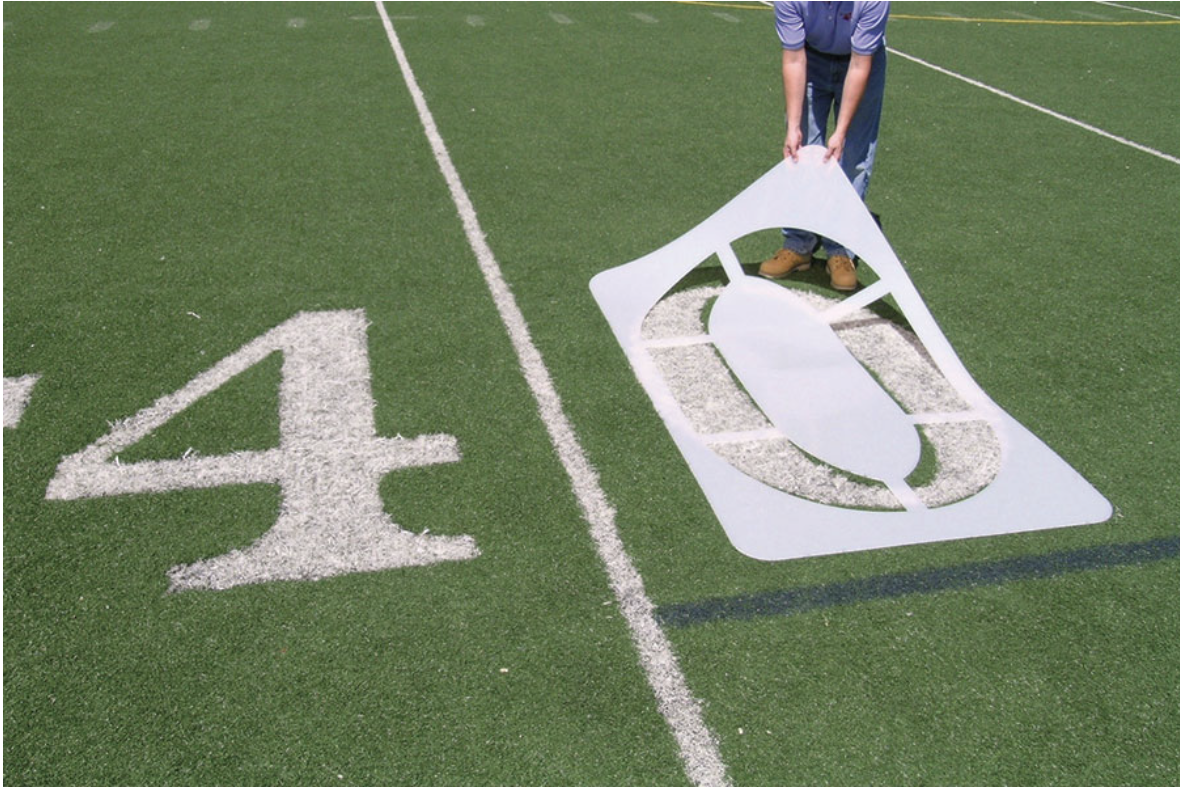
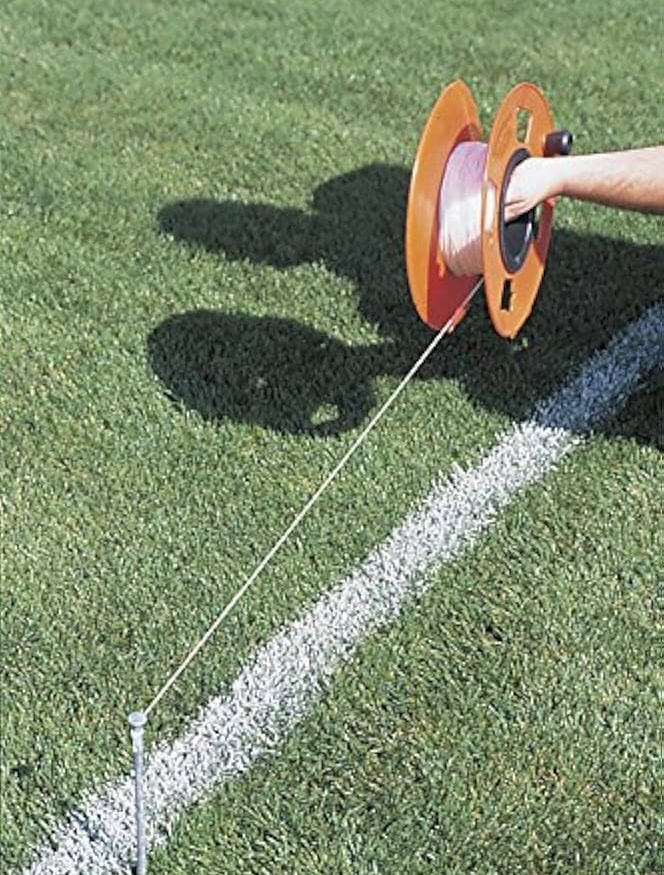
Tools of the Trade
Note: It is possible to purchase field lining “kits” from band-specific retailers (such as Bandshoppe) for anywhere between $300 and $600. While these are certainly handy, they are not absolutely necessary, as long as you have the tools listed above and at least three people to help.
Directions
Please read these directions carefully before you begin to set the field markings. It is not an easy thing to “erase” a poorly-marked field and start over!
1. Pre-Marking Decisions. Decide how much “field” you need. It makes little sense for a marching band of 40 members to line an entire 120 yards of football field (100 yards plus the two end zones) if the drill is only set inside the 30-yard lines. Obviously, larger bands may need a full-sized field, and medium-sized bands may need a slightly smaller field, etc. 2. Set the Front Sideline. As mentioned above, this can be up to 360 feet if you are painting a full field plus end zones (100-yard field, two 10-yard endzones / 120 yards x 3 feet = 360 feet). If, for example, you only need enough field to accommodate a show that stays between the 25-yard lines, you’d set a 150-foot sideline (25-yard line to 25-yard line = 50 yards, 50 x 3 feet = 150 feet). Set the line with your tape measure and marking rope running alongside it. Make sure to pull the rope taut! Remove the measuring tape, leave the rope in place, and paint the Front Sideline. 3. Set the front yard line “ticks.” Decide where the 50-yard line is going to be, and place a large perpendicular “tick” for it at the Front Sideline. Then set out sideways from the 50-yard line tick and place small ticks for the other yard lines, every 5 yards (15 feet). If you use End Zones, don’t forget that they are 10 yards wide (i.e., 30 feet). This process needs to be incredibly accurate in order to get the field dimensions correct, so please measure your yard line distances carefully! 4. Set Center Field. Welcome to the magic of triangulation! This step is best accomplished with a field-lining accomplice (or two). Measure out 200’ of the tape measure, with one person (p1) holding the 0’ mark, another person (p2) holding the 100’ mark, and a third person (p3) holding the 200’ mark. Have (p1) go to the Side One 30-yard line tick on the Front Sideline, have (p3) go to the Side Two 30-yard line tick on the Front Sideline, and finally, (p2) should pull the two 100’ lengths tight out onto the field. This should be 80’ from the sideline, and marked as the center (many like to use a big orange or red “X” here, though white paint is perfectly acceptable as well).
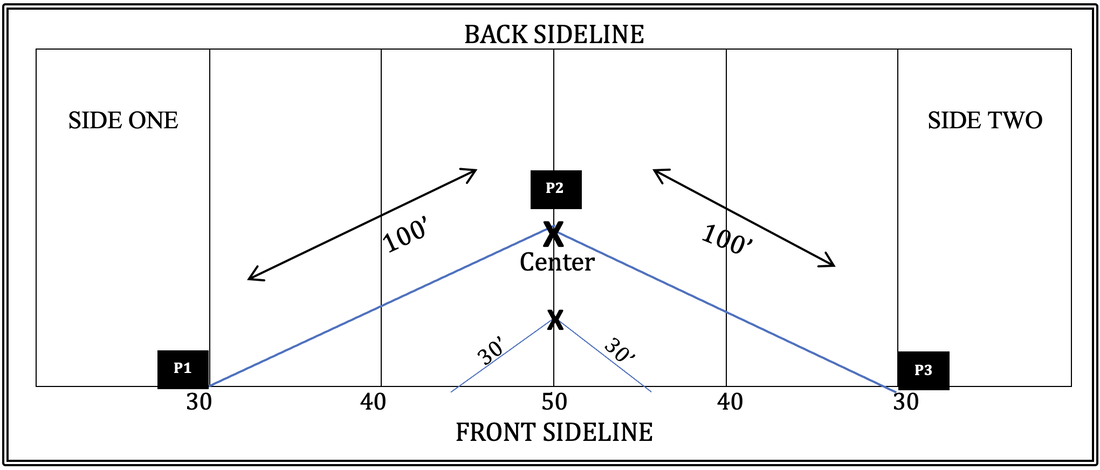
Setting Center Field
5. Set the 50-yard line. Measure 160’ from the front sideline, making sure to cross all of your points in a straight line, and mark where the back sideline should be. Set down the marking rope and paint the 50-yard line. During this process, you should paint tick marks for your front and back hashes. Hash marks are placed in different areas of the field depending on whether the field is used for high school, college, or NFL (and let’s not even get started with Canadian football fields).
Pro Tip: It might be handy to have a pre-measured length of marking rope (separate from the main marking rope) or thin chain to use for quickly setting the hash marks.
6. Set the End lines. This step obviously only applies to marching bands that require a full field. Measure out 200’ of the tape measure, with (p1) holding the 20’ mark, (p2) holding the 100’ mark, and (p3) holding the 200’ mark. Keeping in mind that an End Zone is 10 yards/30 feet long, have (p1) stand on the Front Sideline at the back of the End Zone (in other words, 10 yards/30 feet past the Goal Line tick).
7. Have (p3) stand at the 10-yard line tick on the Front Sideline, and have (p2) pull the line taut, much in the same way as was done for the 50-yard line. (p3) should line up with the center mark. Put a mark in this spot (make sure the rope is taut!). Now paint the Side One End Line (160’ from front sideline to back sideline). During this process, you should also paint tick marks for your front and back hashes, to be painted once the yard lines and back sideline are finished. Repeat this process for the Side Two End Line. 
Setting End Zones
8. Set the Back Sideline. At this point, you should have two End Line ticks, as well as the 50-yard line tick on the Back Sideline and should be able to pain the Back Sideline by intersecting your guide rope from End Line to End Line through the 50-yard line tick. Put down tick marks every five yards/15 feet for each yard line
9. Set your remaining yard lines. Connect the tick marks on the front sideline to the back sideline and paint your yard lines. Always make sure your guide rope is taut! 10. Set your Hash Marks. You can similarly now run your guide rope from end zone to end zone through the hash mark ticks and paint your front and back hash marks. NCAA and High School Regulations
The following regulations govern the lining of football fields at the HS and college levels, and should be kept in mind:
The following videos may be useful in helping to understand field lining: Miscellany
Got any tips that can help make field lining even easier? Any corrections or elaborations on anything above? Feel free to leave a comment!
And as always, if you are in need of marching band drill design or music arrangements, check out the linked pages for the services I offer. |
MeMusician. Educator. Conductor. Archives
April 2025
Categories |


 RSS Feed