
Marching Band Drill Design
Just got hired with band camp less than a month away?
Perhaps you have a busy summer schedule that prevents you from writing drill…
Or maybe you’re ready to let go of drill writing and focus on other duties and responsibilities?
You’ve come to the right place!
Custom Marching Band Drill Design
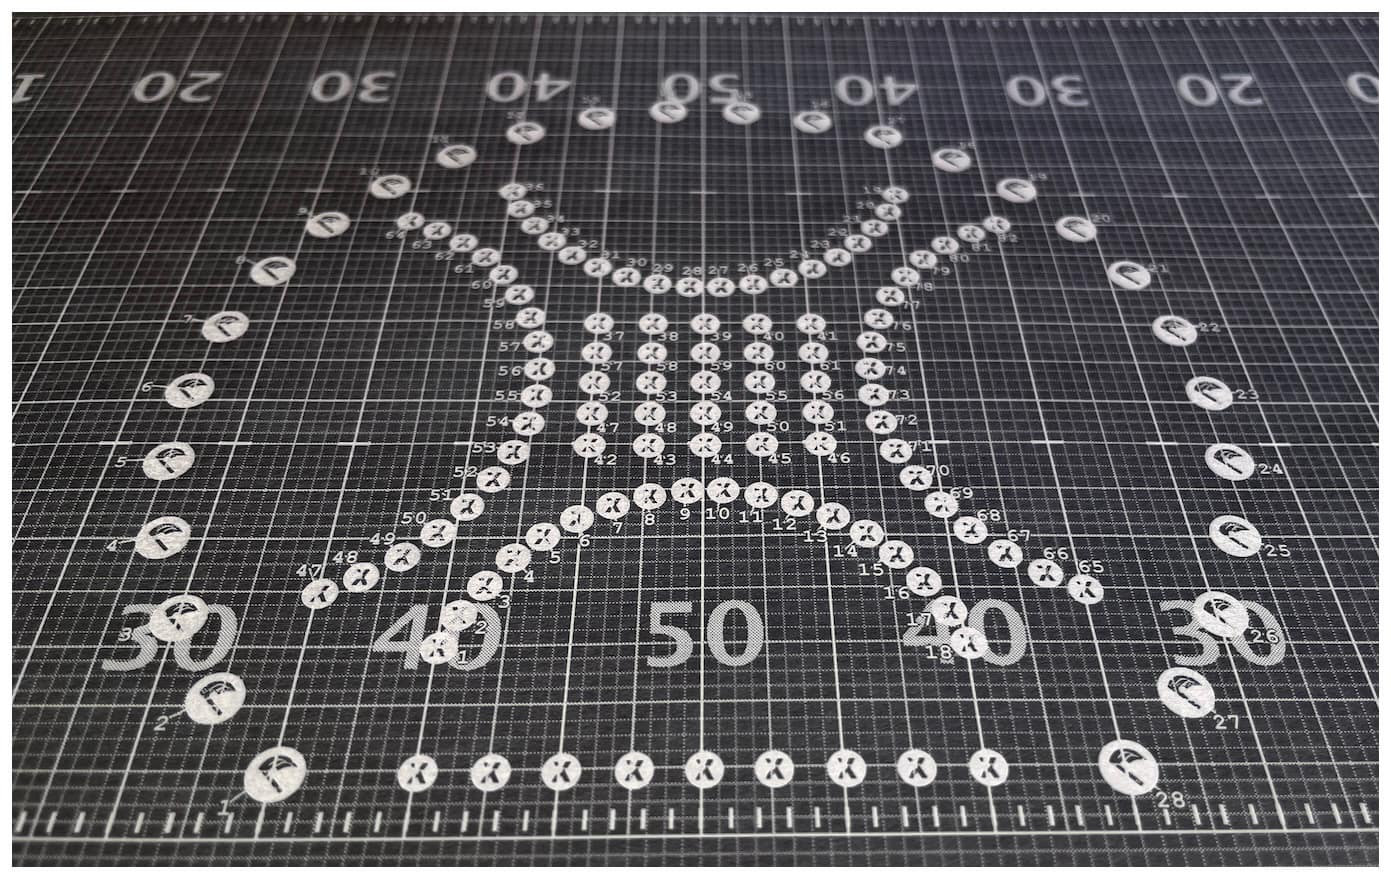
I’ve created engaging, easy-to-clean visuals for high school and university marching bands of all sizes and skill levels. I specialize in dynamic, visually impressive drill that is both teachable and effective on the field. From 50-member high school groups to 400-member college marching bands, my designs help your band look and sound great. It will also engage everyone involved in the process, from band members to audiences to judges.
As a conductor and music arranger, I understand the importance of proper instrument staging to complement the music. My designs will always position your students for optimal impact. You need never worry about trumpets with the melody being staged behind the back hash or outside the 20 yard line…unless that is what you want.

Custom Drill Design includes:
- Completely customized marching band drill design, written using the latest version of Pyware Drill Design software.
- A set of PDF charts and coordinate sheets, customized to your specifications and terminology.
- Clear and concise instructions on each chart of the drill.
- Compatibility with UDBapp and Pyware Viewer App.
- Pyware 3D animation videos of the drill design in action, synced to audio (if provided by director).
- Drill that is tailored to the ability level and style of your band.
As an educator, I understand and value the importance of timely communication. I will always respond quickly to your emails and phone calls, and you can trust me to deliver your project on time.
About Me
I got my start in the pageantry arts like everyone else: by being a member of my high school’s marching band. After graduation, I became a member of the Phantom Regiment Drum and Bugle Corps during some of its most successful competitive years (1991-1994), starting as a lead baritone and later serving as one of its drum majors.
After earning a degree in Music Education from Florida State University, I landed my first high school teaching position in South Florida, and began writing drill for my own marching band. That soon expanded to writing drill for other marching bands across the region.
In those early days, I wrote drill by hand, using traditional tools like flexi curves, drafting compasses, protractors, lightboards, and Raxsdale Drill Design Paper. I later transitioned to Drill Quest software, before finally upgrading to Pyware, which I still use today. I’m also a beta tester for Pyware, helping refine the tools I use every season.

With 25+ years of drill writing experience, a thorough understanding of drill design software, and varied experience in the pageantry arts, I am dedicated to creating marching band drill design that helps elevate your band’s performance.