|
One of the questions I am often asked - especially by former students setting out to write their own drill for the first time - is: "How do I write for my band when it's this small?" After good-naturedly reminding them that we discussed this very issue in our Marching Band Procedures courses "back in the day," I usually chat with them about strategies that have worked for me when designing for smaller, younger, or less experienced groups.
Over the years, I’ve written drill for ensembles as large as 400 members and as small as 26. Both ends of that spectrum come with their own unique challenges and rewards, but designing for smaller groups requires a completely different mindset, one that balances visual impact, musicality, and achievable staging for limited numbers. Since drill-writing season is fast approaching, I thought I’d share a few insights and tips for those of you writing drill for small marching bands. Whether you’re a first-timer or a seasoned designer working with a newer program, these ideas should help get the creative gears turning and help anyone who might be struggling to find a style that works with their own small/young groups. And hey, if you’d rather not go it alone, I’m always available to write your drill for you. Check out my portfolio and send me a message. I'll be happy to chat with you about writing your marching band's drill this season. Now, let’s get into the tips for designing drill for smaller or younger bands… The Basics of Drill Design
Simplicity Wins
This one took me a long time to really learn: Keep. It. Simple. Not every set has to be flashy or complex to make an impact. In fact, some of the most effective drill I have written uses simplicity as a strength. Clean, purposeful staging often lands harder than constant movement ever could. When you are writing for a small or developing band, simplicity isn't just a stylistic choice, it's a strategic one. Giving your students a few moments of less demanding movement provides visual and musical “breathers” that help with performance quality. Not every set needs to be a big reveal. Sometimes, the smartest design move is to keep things readable, intentional, and (most importantly) achievable. Your band will execute better, and your audience will appreciate the clarity. Shape and Form Choosing the right types of forms can make or break your visual program, especially when you are writing for a small band. Each style of form carries its own strengths, challenges, and visual impact. Here’s a breakdown of the major types and how to use them effectively:
With some of those basics of drill design out of the way, let's talk about issues encountered when writing specifically for smaller or younger bands. Writing Specifics for Smaller Bands
GroupThink
When you are designing drill for a smaller ensemble, section cohesion is everything. Keeping sections together - winds, percussion, and color guard - helps reinforce musical confidence and visual clarity. Even within those groups, keeping similar instruments close can make a noticeable difference, both musically and visually. Yes, we all know to keep high brass near high brass, low brass near low brass...but don’t stop there. If you are familiar with the score (and you should be), you can group instruments that play similar musical roles, even if they aren't technically in the same section. For example, you can combine mellophones with alto saxophones, or low brass with tenor saxes, or trumpets with piccolos/flutes/clarinets if they share similar musical material at any given point. When instruments playing the same material are staged near each other, you boost ensemble confidence and clean up the sound. Plus, it gives you a more visually homogenous look, which is always a win for small bands trying to maximize their on-field presence. Careful drill writing that reinforces the score? That's where small bands can really shine. The Power Zone If there's one drill design principle that matters most for smaller or less experienced bands, it’s this: Stay in the (Power) Zone. Top-tier BOA bands and DCI corps can spread coast-to-coast across the field and still deliver musical impact, ensemble cohesion, and clean visuals. Smaller groups? Not so much. The wider you spread them, the more you risk losing projection, clarity, and control. The Power Zone (roughly the middle 30 yards of the field, centered around the front hash and the 50-yard line) is your best friend. It's where your band will sound fullest, stay together most easily, and connect visually with the audience. Pulling too far outside this zone usually results in watered-down sound and shaky ensemble timing. Don't mistake the “power zone” for a “boring box.” A creative drill designer can still work plenty of magic within this area. You can create dynamic staging, layered impact points, and strong visual moments, all while keeping the band positioned for success. Plus, by keeping performers in the audience's primary sight lines, your best moments won't get lost in the corners of the field. It's all about doing more with less, and making sure your band always plays (and looks) bigger than it is. 
The Power Zone
Intervals
When designing for a small band, interval size matters more than you might think. Too tight, and your band looks cramped, too wide, and you risk losing musical cohesion. So what's the magic number? Three. 2-step intervals often make the group look smaller than it actually is. 2-step is visually compact, but not exactly impressive from the stands. 4-step intervals can make your band look larger, but can spread your winds too far apart, especially in curvilinear or symmetrical forms. That often leads to phasing, lack of ensemble confidence, and weaker musical impact. 3-step intervals hit the sweet spot. They give your drill a more expansive, open look while keeping your players close enough to stay together musically. This interval works wonderfully in curvilinear forms, where flow and spacing are key. It offers the best of both worlds: a bigger visual footprint without sacrificing cohesion (or power). In short? If you want your small band to look and sound stronger, 3-step interval spacing is the way to go. You can experiment with using other intervals: I've used a 2.5-step interval in the past, to mixed results. Check out the examples below:
While 3-step intervals are great for curvilinear forms and keeping smaller bands tight without looking cramped, they don't work quite as well in geometric shapes or traditional fronts. Why? Simple: they break the natural flow of the “On, 2 Off, or In Between” (O2OIB) alignment method that we've taught students forever. This simple spacing system has made it easy for decades of performers to find their place on the standard 8-to-5 grid, and 3-step intervals throw that off just enough to cause problems in fronts and precise forms.
Instead, when writing geometric shapes, fronts, or linear forms, go with 2-step intervals for tight, powerful formations that maintain cohesion, or 4-step intervals for broader coverage and a more expansive visual look (provided it does not spread your band too far apart). Both of these options align naturally with the 8-to-5 grid, making it easier for students to clean and easier for designers to build around. As mentioned earlier, block formations can pack a punch. Even a simple block can convey message and meaning. But your blocks will have more impact if they are "windowed." In a standard block (for example, 4-step spacing left-right and front-back), you run the risk of looking smaller due to the negative space created between columns. You also have the issue of directional brass instruments playing directly into the back of the person that is 4 steps in front of them (an even bigger issue for trombone players if your block is smaller than 4-step intervals). With windowed blocks, each row is offset, allowing all performers to be visible, helping project the sound without any obstructions (i.e., every spot will have more free space in front of them), and making the group look larger by visually filling the negative space. The offset rows create depth and visual interest in a way that the standard block does not. See the images below for an example.
The Color Guard
If you have a small marching band, you probably have a small color guard. And if you are working with a small color guard, you have probably faced the temptation to spread them across the field to make them look bigger. In my experience, that is usually a mistake. If your guard has fewer than 12 members, keep them together. Splitting a group of eight guard members into two groups of 4 on either side of the field might seem balanced, but it severely weakens their visual impact. Their strength lies in motion, color, and ensemble effect, and that is amplified when they move as one. A unified color guard enhances clarity, power, and contributes more significantly to the visual package, especially in small-band settings. One of the most effective ways to feature your guard is to integrate them into the band itself (especially in blocks). It adds visual interest and gives the impression of a larger, more coordinated ensemble. Although there are obvious size and ability level differences, think of the moment in the 1993 Phantom Regiment show when the guard pops out from behind the horn players in Fire of Eternal Glory. How could you do something similar with your guard? Moments like this are simple, but highly dramatic and visually unforgettable. Of course, you need always be mindful of intervals with guard staging. Depending on the choreography, it is always advisable to keep the guard at a minimum 6-step interval, with 7- or 8-step intervals (or larger) being better for complex choreography. All the World's a Stage
A football field is a massive stage. Large university and high school marching bands make that stage appear smaller through sheer size. Smaller bands operate at a disadvantage in this particular area, but...what can we do about it? Luckily, there is no need to reinvent the wheel. Bands of all sizes have been experimenting with redefining the field boundaries for decades.
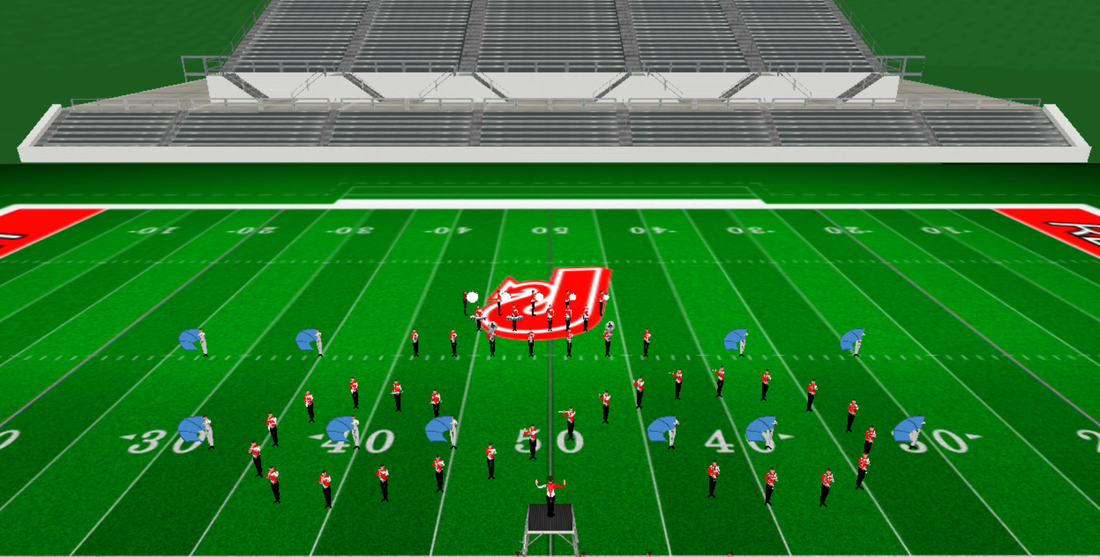
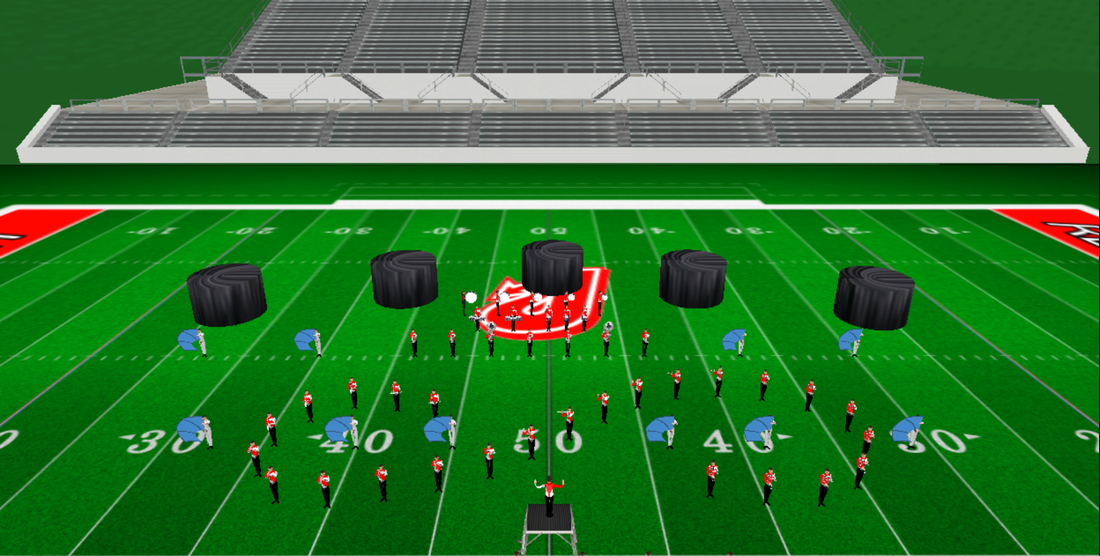
One of the best ways to "shrink" the field and make your band seem larger in the process is to use props or other backdrop devices to help focus the audience's attention on the perceived field, instead of the actual field dimensions. This creates visual boundaries that frame your band, and reduces negative space. Check out the two examples below. Even simple props like the ones pictured on the right can help to reduce the field and make the ensemble look bigger.
Cutting off the Field
Jackson Academy from Mississippi has been doing this for 30+ years. As far back as I can remember, they have had successful marching bands (especially relative to the size of the institution), and they were one of the earliest bands to show the power of making the field look smaller.
Jackson Academy, 2011
However, keep in mind: Props can be difficult and finicky. If you are going to use them to help change the field boundaries, make sure they look polished (well-painted, not held together by duct tape, etc.), make sure they are easily transported and can be set up/broken down in an easy manner that doesn't take long, and make sure they can withstand outdoor conditions. Especially wind. I'm sure every band director and drill designer has horror stories they can relate about props that have made sudden, wind-assisted dashes for "freedom."
Even simple elements like sideline banners, wing props, or minimalist backdrops can create a more intimate, focused stage. The key is making them intentional and functional. Props that are fully integrated with your show theme allows for your performers to interact with them more organically throughout the show. Artistry in Motion
At the end of the day, you are still writing drill that comes to life only when in motion. When writing for small or developing bands, that often means striking a balance between musical integrity and visual energy. Here are a few techniques that can help maximize your show’s effect, without burning out your performers.
Counter-Motion One of the easiest ways to make your show feel more dynamic, without increasing tempo or step size, is to use counter-motion. When different sections move in opposing directions, it creates the illusion of speed and complexity, even at a moderate temp, standard 8-to-5 pace. This technique can simulate higher velocity and inject excitement and energy into transitions and impact moments. It can also make small bands look larger by filling more of the field visually, even if overall movement is limited. Staggering Responsibilities You don't need to have everyone moving all of the time. Instead of making everyone march during every phrase, stage the band's movement in layers. When one group is playing a complex or expressive line, let them hold position while others move around them. This adds visual contrast, without a sacrifice in sound. You know who has absolutely MASTERED this, even though they could probably jazz run at 180bpm and still play most of their music flawlessly? The Blue Devils. Go watch any of their shows from the past several decades, and you'll see plenty of examples of intelligent drill design and staging, especially the staggering of musical and visual responsibilities. This has the added benefit of helping prevent fatigue/giving certain sections of the ensemble a break from movement. Size Matters Large step sizes and complex, intricate musical passages simply do not mix. You want to make sure your members are at their most confident during their most difficult or expressive musical moments. Having them moving backwards at a 6-to-5, or doing jazz runs of 4-to-5 across the field, completely upends that maxim. Save the larger step sizes for percussion features, or for sections that accompany the main melodic motives. This will result in a more confident and polished musical AND visual performance.
What say you? Did I miss any obvious design tips for smaller or less-experience groups? Feel free to chime in with tips or tricks that have worked for you.
And as mentioned earlier, check out my services if you find yourself in need of a drill writer or music arranger for your marching band this season (or check out my existing stock of marching band music arrangements).
I consider myself incredibly fortunate to have started my drum corps journey with Phantom Regiment during the early 1990s. None of us could have known at the time that we were witnessing the end of an era, as the pageantry world was about to lose three visionary drill designers whose innovations forever reshaped the activity, leaving a lasting impact on both drum corps and high school marching band drill design.
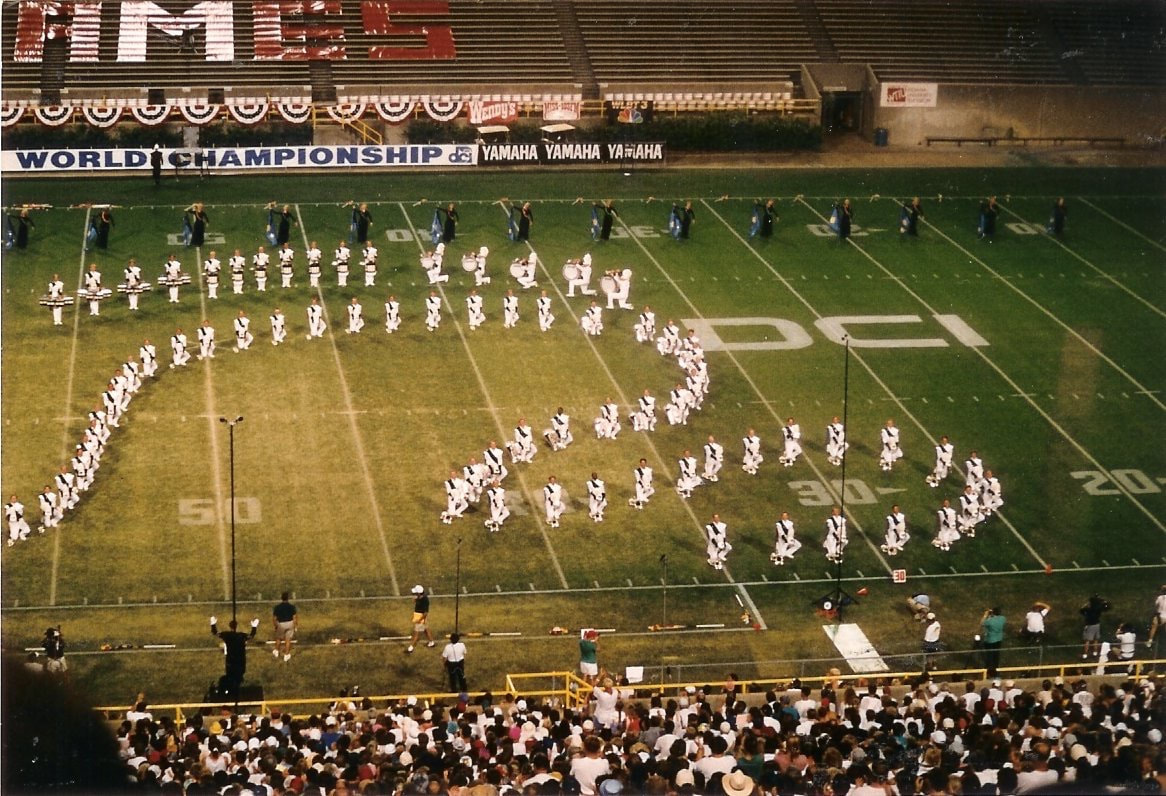
Phantom Regiment 1993, end of Fire of Eternal Glory
John Brazale's journey with the Phantom Regiment began with his work for the color guard, but by 1980, he had taken the reins as the corps’ drill writer. His impact was profound, and even after his passing following the 1992 season, his influence remained deeply embedded in the activity. His work with Regiment, particularly in 1988, 1989, and 1991, was a major source of inspiration for me, and I feel grateful to have been a part of his final two drill designs (1991's Phantom Voices and 1992's War and Peace). Brazale’s ability to craft elegant, sweeping formations that mirrored the emotional depth of the music made his designs effective and unforgettable (the 1989 New World Symphony production spurred me to audition for the Regiment).
Phantom Regiment 1989: From the New World
Steve Brubaker, synonymous with the Cavaliers’ innovative visual style of the 1980s and early 1990s, worked with the corps from 1981 until his untimely passing in 1992. Brubaker helped redefine what was possible in drill design. The 1992 Cavaliers’ show, co-written with Greg Poklacki, was Brubaker’s final contribution, but his mesmerizing, geometric formations had already cemented his legacy. His designs featured angular formations that constantly shifted in visually engaging ways, complex rotating and expanding geometric patterns, and an emphasis on precision and timing, making formations appear to evolve seamlessly.
This style became the hallmark of The Cavaliers, leading them to a steady rise up the ranks during the late 80s, culminating in their first DCI championship in 1992 (and eventual dominance during the 2000s with one of Brubaker’s protegés, Michael Gaines). His 1989 and 1990 designs, in particular, deeply influenced my own approach to drill writing. Watching his kaleidoscopic motion unfold across the field was like witnessing music come to life in a way no one had seen before, and he influenced countless high school marching band drill writers of the 80s and 90s.
Cavaliers 1990: Cavalier Anthems
And then, of course, there was George Zingali, a true innovator whose work with the 27th Lancers, Garfield Cadets, and Star of Indiana was nothing short of revolutionary. His groundbreaking designs shattered expectations of what drill could be, combining dynamic movement with deeply expressive visual storytelling. Drawing inspiration from natural phenomena like water droplets, Zingali’s asymmetrical “flex-drill” techniques allowed for fluid, organic formations and continuous motion, with performers shifting seamlessly between forms rather than moving in rigid, predictable ways.
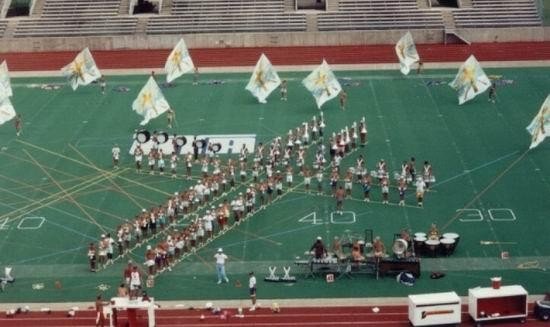
Zingali’s early innovations culminated in the Cadets’ 1983 DCI Championship-winning show, which changed drill design forever by proving that movement could be as expressive as music itself. His work with Star of Indiana helped win them the 1991 DCI Championship with the legendary Roman Images show, but my absolute favourite drill of his from any point in his career has to be the 1990 design for Belshezzar's Feast.
Star of Indiana 1990: Belshezzar's Feast
The story of 1991’s “cross-to-cross” rewrite is one of those drum corps urban legends that is oft-embellished, with people claiming Zingali wrote the new ending during Finals Week (or, in some tellings, the night before Finals). In reality, Zingali wrote the new ending when the corps was touring in Massachusetts, and it was first performed at the Lynn show, almost a week before DCI Quarterfinals (the old design involved a cross transitioning into a crown set, and then back out to a cross).
Star of Indiana 1991: Learning the Cross-to-Cross
What is not embellished, by all accounts from people who were there (and from what I remember hearing during the season as one of their competitors) is that Zingali taught the new ending without drill charts. He had a vision of how he wanted to end the show, and in a 5-hour frenzy, directed members to their new spots (while visual techs scrambled to chart the new sets on the fly), finishing sometime around 2am that night, cementing an unforgettable moment in drum corps and drill design history.
To that “pantheon” of designers, I could add many more that have come since, who have all influenced my own drill writing in some way: Myron Rosander. Marc Sylvester. Leon May. Michael Gaines. Pete Webber. Jeff Sacktig. Jamey Thompson. Although I no longer design for über-competitive bands, choosing to focus on “show style” or non-competitive high school and university bands, I still use techniques and ideas learned by watching the work of these gentlemen. Reflecting on their contributions, I can’t help but wonder: when will we see more female designers rise to the top echelons of the activity? The art of drill design is ever-evolving, and I look forward to the day when the field is as diverse and inclusive as the students and performers it serves. Although the world of drum corps and marching band drill design has changed drastically since "the days of yore," the activity is still deeply rooted in history. As part of a “Marching Band Techniques” course I teach to university music education students, I delve a bit into the history of the activity, and thought it would be fun to take a (non-comprehensive) look at the history and evolution of drill design. Early Roots
In the United States, the earliest marching bands were university bands, in most cases associated with military ROTC programs. These bands would have emphasized uniformity, discipline, and efficiency. Their "drill" (such as it was) would have been characterized by straight-line formations that moved in block-style units with limited motion, call-and-response maneuvers dictated by the drum major or commanding officer, and was primarily used for parades and ceremonies. Marching styles were highly regimented, emphasizing sharp, 90-degree turns and perfectly measured step sizes.
It is interesting to note that marching bands existed long before they were associated with football halftimes: The oldest University marching band is Notre Dame’s Band of the Fighting Irish, formed in 1845. Their first performance at a football game, however, came 42 years later in 1887! These early bands would have marched in parade blocks and squad formations. At this point in marching band history, true creative drill design had not yet emerged. The earliest example of something other than a squad-based military formation came from Purdue University in 1907, when they produced a "Block P" during a performance of school songs. 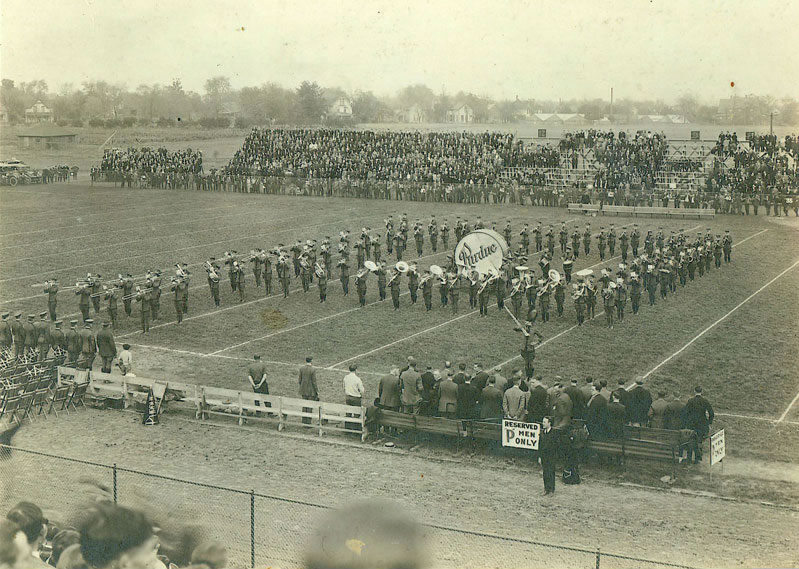
Block P - Purdue University Marching Band
That same year, the University of Illinois Marching Illini performed what is considered to be the first halftime show, at a football game against the University of Chicago. Over the next few years, almost every university in the Midwest developed a marching band that could entertain the crowd during halftime of games, and before long the trend spread nationwide. The new "fad" caught on with high schools as well, and over the next decade or two, marching bands would spread to most high schools and universities in the United States.
Nor was marching and music limited only to schools: Starting in the 1930s, organizations such as Boy Scout troops, VFW (Veterans of Foreign Wars) chapters, and the American Legion began to organize their own marching bands as a service to the local community (i.e., to help keep kids “off the streets.”). Using no woodwinds, these groups featured only drums and brass bugles pitched in the key of G, and eventually became known as Drum and Bugle corps. Early drum corps maintained a military aesthetic, prioritizing uniformity and discipline over artistic visual design. Drill design during this era would have taken one of two primary forms:
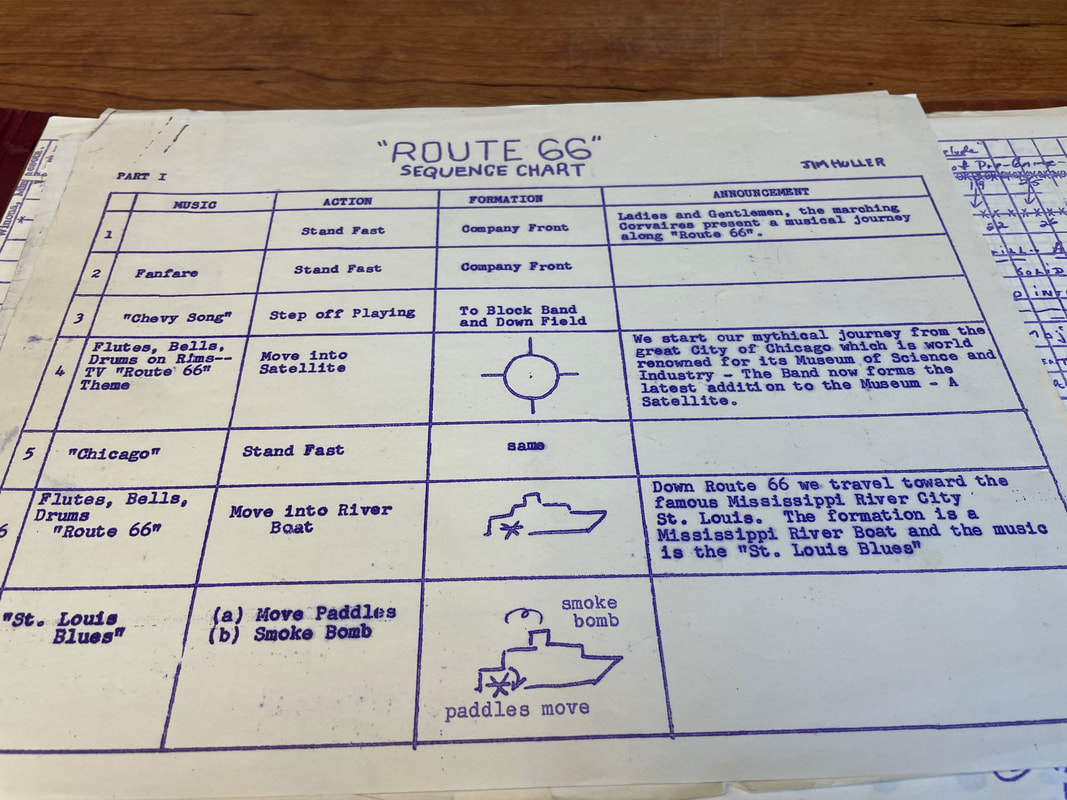
Sequence chart from the late 1950s
Precision Drill
A.R. Casavant was one of the most influential figures in the transition to the more dynamic and expressive visual designs seen in modern marching bands and drum corps. His concepts challenged the rigid, symmetrical block formations of military-style bands as well as the chaotic, anarchic style of pageantry bands, paving the way for the fluid, musical storytelling that defines contemporary marching ensembles.
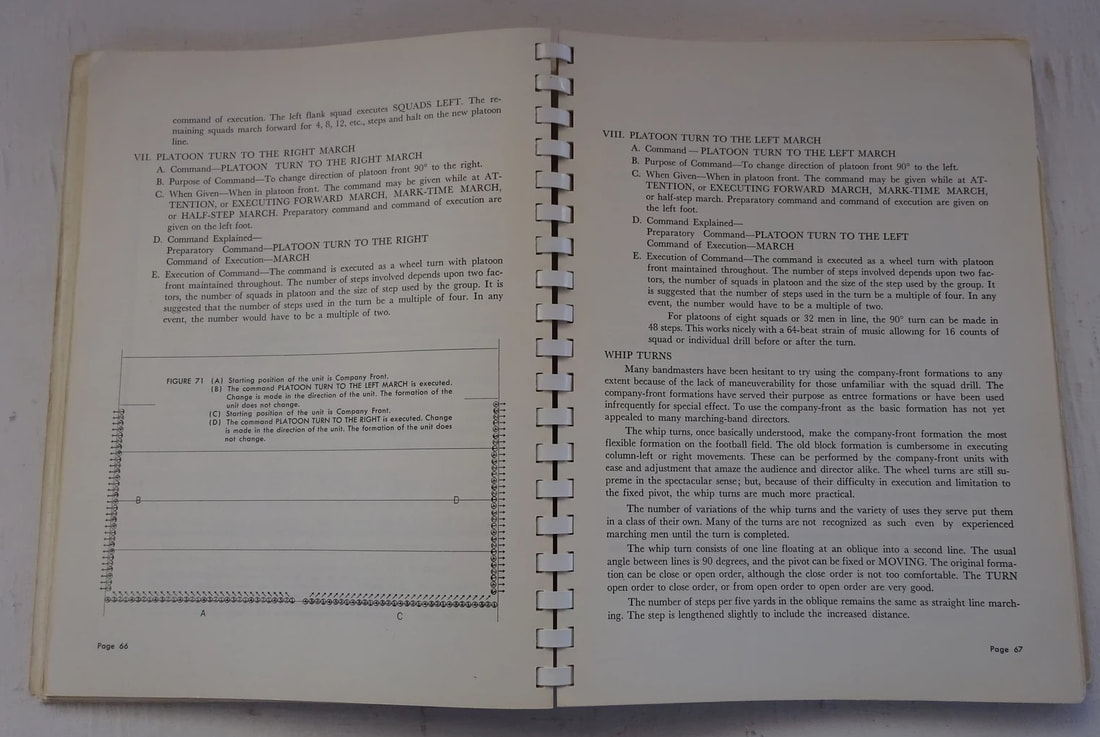
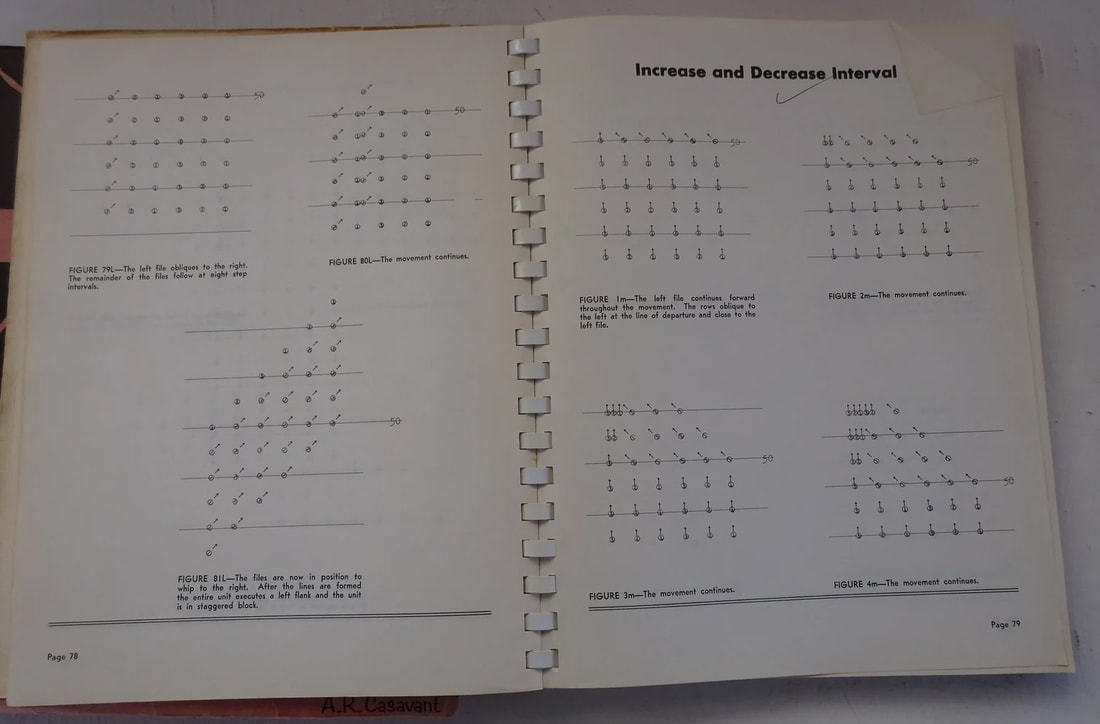
Casavant attended the Tennessee Military Institute (TMI) in Sweetwater, TN, where he studied business administration and led the school's regimental band. After graduating in 1938, he remained as an instructor while attending the University of Tennessee at Knoxville on a track scholarship. In 1938 he started the band program at McMinn County High School in nearby Athens, TN, later moving to Chattanooga High School. During this time, Casavant also led the local American Legion Post drum and bugle corp to a state marching championship in 1952 and 1953. During this time, he began to develop a method of marching and maneuvering that drew on the best that each existing drill style had to offer, and incorporated dance, theater, and art, with a focus on crisp geometric forms. His developing method was based on much research into various military styles, mathematics, physical education, and theatre. Casavant's "path vocabulary" (a method of getting from one place to another geometrically, without scattering) would come to be known as "Precision Drill." "Precision Drill is a concept of marching. It is a method to change the direction of a formation, to change the organization within the formation or to change from one formation to another. Precision Marching, or Precision Execution, refers to a standard of execution. Precision Execution is that execution that very few attain - the perfection of human uniformity in movement. Precision Marching is that execution when the difference in position and movement of individuals is not discernable [sic] by the human eye...above the tolerance of an experienced judge."
Examples from Casavant's "Precision Drill" textbook
Precision Drill became a sensation when Casavant's Chatanooga High School marching band performed on national television during a Washington Redskins home football game in 1955. Casavant would go on to author over 40 books on his method, and marching in general. At the end of the 1958-59 school year, demand was so great for Casavant's services around the country that he left Chattanooga High School to pursue clinical teaching full time.
The Rise of Competition
In the 1960s, Patterns of Motion became the de facto method for teaching and designing drill. This method was based on a constant-motion system using four-player squads marching 8 steps to every 5 yards, utilizing 22 and a half inch steps, at a 2 step interval. If you've ever seen an HBCU (Historically Black College/University) marching band, then you've seen something very closely related to Patterns of Motion.
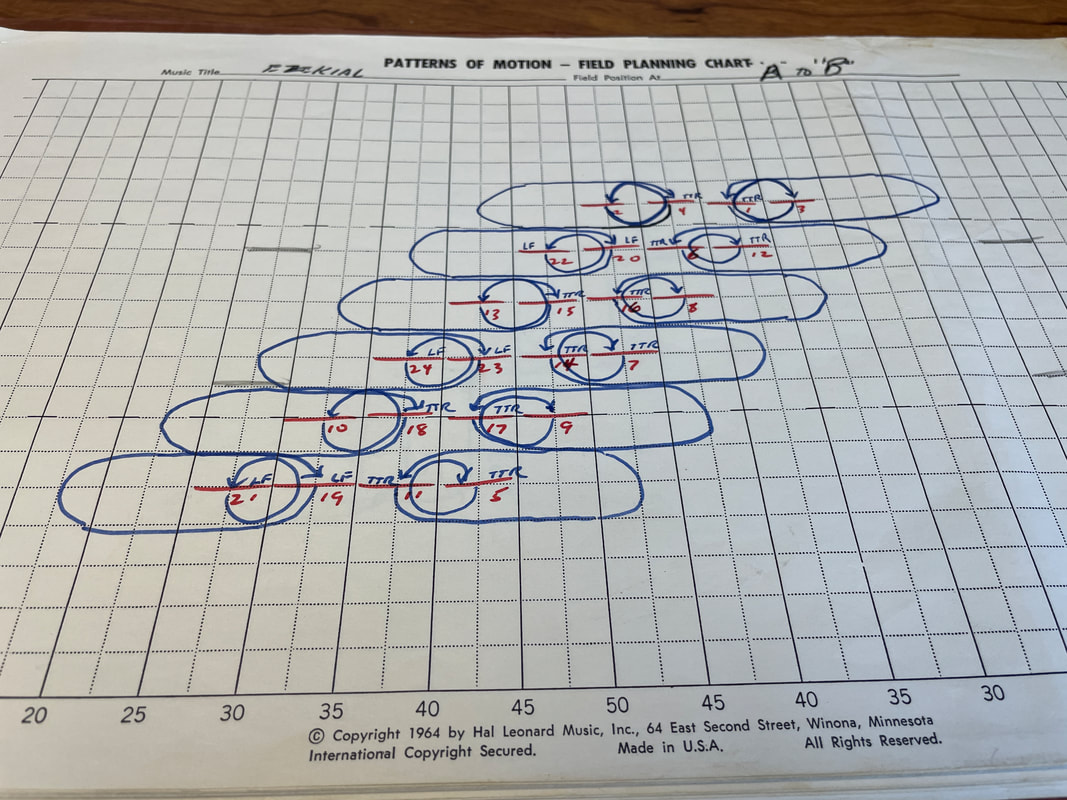
Patterns of Motion Concept Drill
Created by Bill Moffit, who was band director at Michigan State University at the time, the approach was in stark contrast to the military style of marching in ranks, and performing flanks and column movements. Patterns of Motion revolutionized how college and high school marching band shows were designed and taught. It remained a popular style of drill design up until the late 1980s/1990s, when so-called "corps style" (and the rise of computer software which enabled it) surpassed it in popularity.
University of Houston marching Patterns of Motion drill
As marching band and drum corps competitions gained popularity, designers began exploring asymmetry, and curved formations began to appear, moving away from rigid squares and blocks. Diagonal movement became more common, allowing for greater visual motion, and drill writers began synchronizing movement with musical phrasing, laying the foundation for modern visual storytelling. A significant influence in this era was Pete Emmons, a designer with the Santa Clara Vanguard, who played a key role in breaking away from symmetrical formations and embracing more fluid, organic movement. Instead of merely moving from form to form, designers started to consider how the drill could enhance the music.
The formation of Drum Corps International (DCI) in 1972 created a new standard for visual performance, pushing designers to experiment with form, motion, and integration of the entire ensemble. The 1970s and 1980s marked the true revolution in drill design, led by visionary designers who redefined how ensembles moved on the field. Drill design shifted from being merely decorative to becoming a crucial component of the overall performance. The 1970s also saw the formation of Bands of America, then called Marching Bands of America, which further encouraged experimentation in high school marching bands. Shows became more theatrical, incorporating simple thematic elements that laid the foundation for future innovations.. 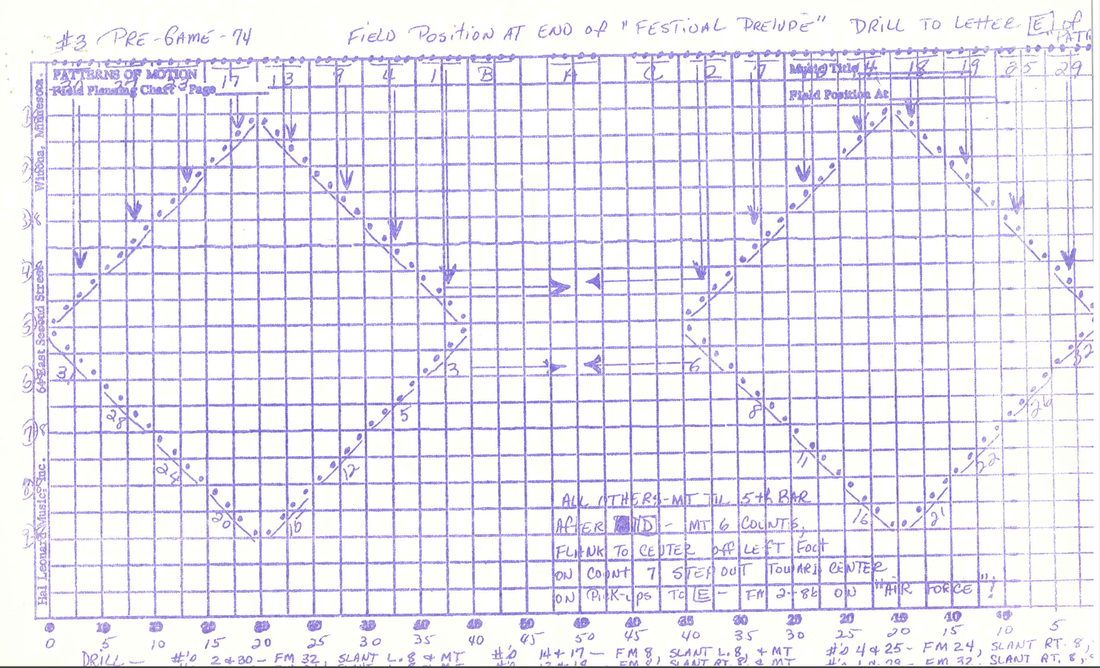
Indiana State University Marching Band (1974) Pregame Drill
"The Golden Age" of the 80s and 90s
The 1980s and 1990s ushered in what many consider the golden age of drill design. With the DCI World Championships being regularly broadcast on PBS, drum corps shows became more widely accessible, inspiring high school and college marching bands to adopt more theatrical and innovative drill concepts. At the same time, Bands of America (BOA) was rapidly growing, turning into the premier high school marching competition circuit in the United States. With this increased exposure, designers were motivated to create more intricate and visually compelling shows, knowing their work would be seen by larger audiences beyond just those in stadiums.
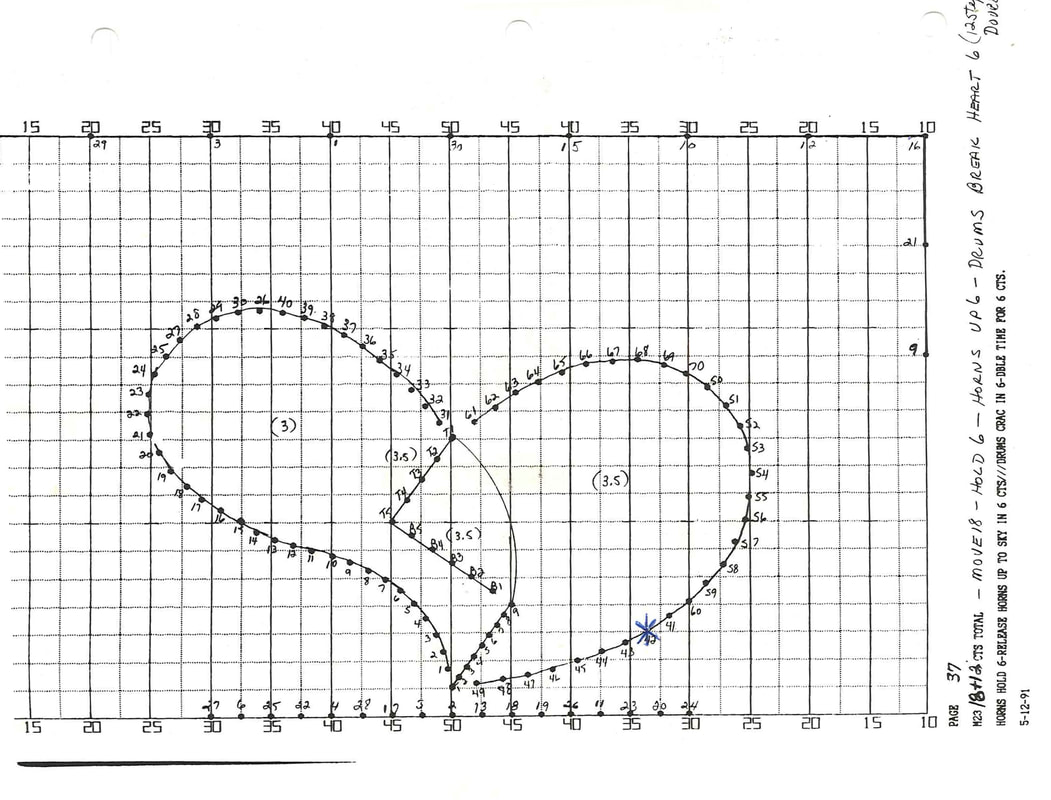
One of the biggest game-changers of this era was the introduction of Pyware 3D Drill Design Software in 1982. Before this, drill writers wrote their drill manually, either meticulously charted on paper grids or, in some cases, improvised on the field with performers recording their individual coordinate points. This method was not only slow and time-consuming, but also limited the ability to experiment.
1991 Phantom Regiment handwritten drill design by John Brazale
With Pyware, designers could now
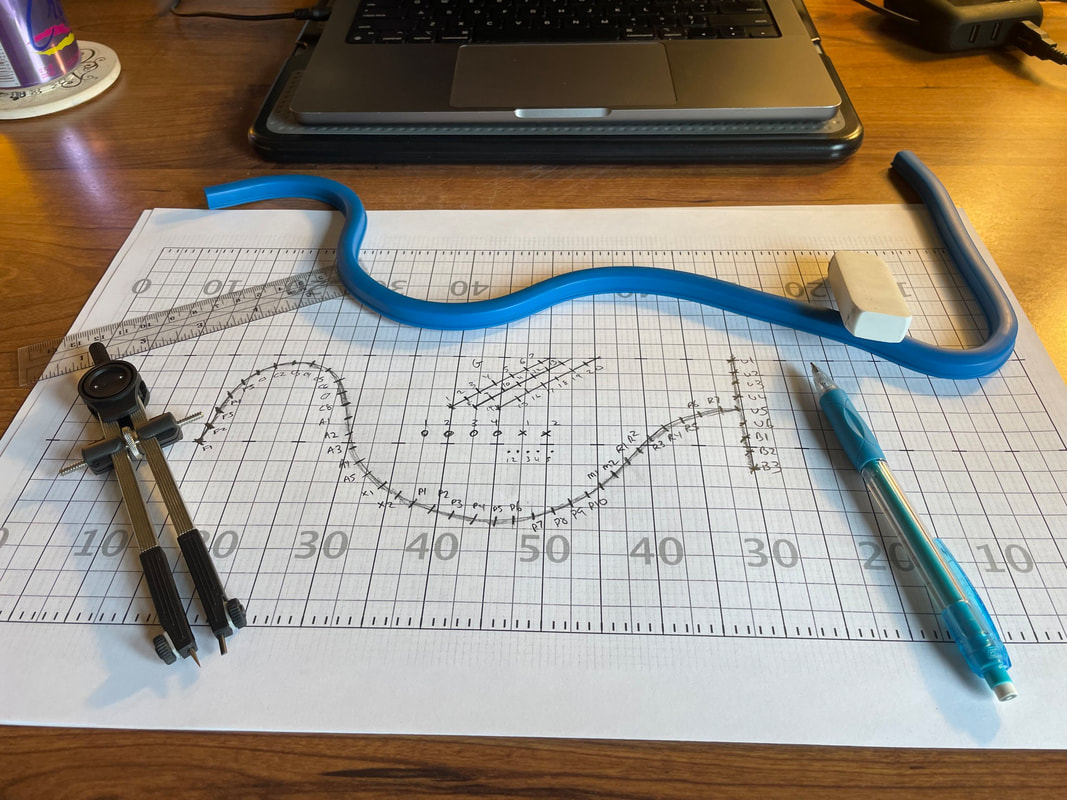
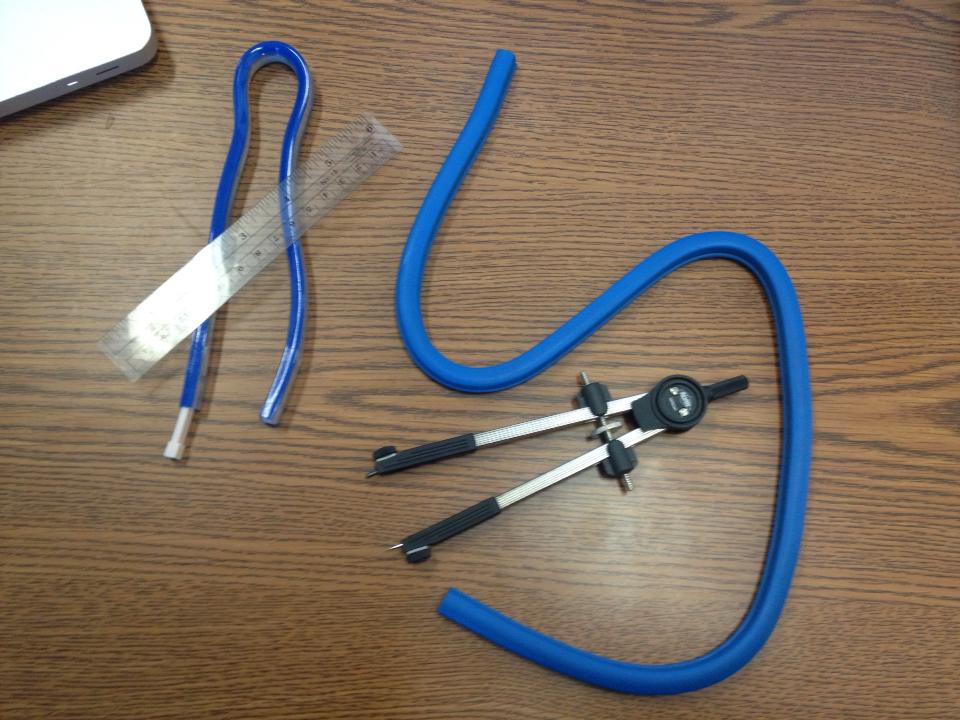
Pyware quickly became an essential tool for high school band directors and emerging drill writers, making advanced design concepts more accessible to ensembles beyond elite DCI drum corps or BOA bands. Full Disclosure: I am a long-time user of Pyware, and currently serve as one of their beta testers, but I began my career writing drill by hand (still have my old tools, see below), then transitioning to an old program called DrillQuest, before finally upgrading to Pyware in 2004.
Tools of the trade for marching band drill writers before Pyware
Another major shift in this era was the expanded role of the color guard. Previously, guards performed parallel to the band, often serving as a separate visual component. However, with the rise of theatrical storytelling in marching productions, guards became an intrinsic part of the overall design. Guard began to be integrated into the corps or band, either inside of forms (instead of always in the back or the sides), or actually becoming part of the formation, making them an active part of the overall field picture.
The use of props and elaborate equipment (such as rifles, sabers, and large-scale flags) were used to enhance visual storytelling, and guards saw an increased emphasis on dance and expressive movement, borrowing techniques from ballet and modern dance. The New Millennium: An Era of Storytelling
The 2000s saw an increasing level of demand for performers, while innovations and improvements to design software like Pyware revolutionized the creation and execution of visual shows. The geometric, dynamic designs of Michael Gaines for the Cavaliers emphasized athleticism and a seamless flow between musical phrases and visual storytelling. His design for the 2002 show Frameworks is often cited as a masterpiece of visual and musical integration (though my personal favourite of this era is his 2000 masterpiece, Niagara Falls).
Jay Murphy’s designs for the Blue Devils leaned into abstract, artistic representations, often focusing on thematic or conceptual shows rather than linear storytelling. His use of minimalist and modern aesthetics redefined the boundaries of what drum corps could convey visually. It's hard to argue with the results...the Blue Devils have racked up 11 of the 25 championships since the turn of the century. By the 2010s, drill design had evolved into a powerful storytelling tool. Both drum corps and marching bands embraced thematic productions, where every aspect of the show was designed to convey a unified concept. Drill was no longer just about formations, but was used to help mood and emotion, and shows continued to blur the lines between pageantry and theater. Designers began to borrow more heavily from other art forms, such as ballet, modern dance, and film. This was reflected in more expressive body movements and staging. While DCI is still considered a step above the best high school marching bands in the country, the distance between the two has narrowed, especially in the creative sense. High school bands continued to adopt many DCI-inspired techniques, but with an emphasis on accessibility for younger performers. BOA Championship Week features myriad bands who incorporate large-scale set pieces, projection screens, and lighting effects to enhance the visual storytelling. Movement is no longer limited to step-based marching…performers frequently run, dance, and interact with props, while integrating modern dance techniques and fluid motion, inspired by WGI (Winter Guard International) and contemporary ballet. Thematic storytelling has become central to BOA performances, with intricate props and large-scale visual effects dominating shows. In many cases (though I am sure some wouldn't admit it), innovations in BOA performances actually influenced DCI instead of the other way around. The fact that many designers work with DCI and BOA (and WGI) groups helps blur those lines. Drill design now integrates elements of dance and acrobatics, requiring performers to be both musicians and athletes. High-speed direction changes, body movements, and prop manipulation demand advanced training, and must be planned meticulously by the drill designer in conjunction with the creative team. Design has also focused more on dynamic staging, where performers are often grouped in smaller pods or scatter forms to emphasize intimacy and individuality. Straight lines and geometric shapes are still used, but often as contrasts to the more organic forms. 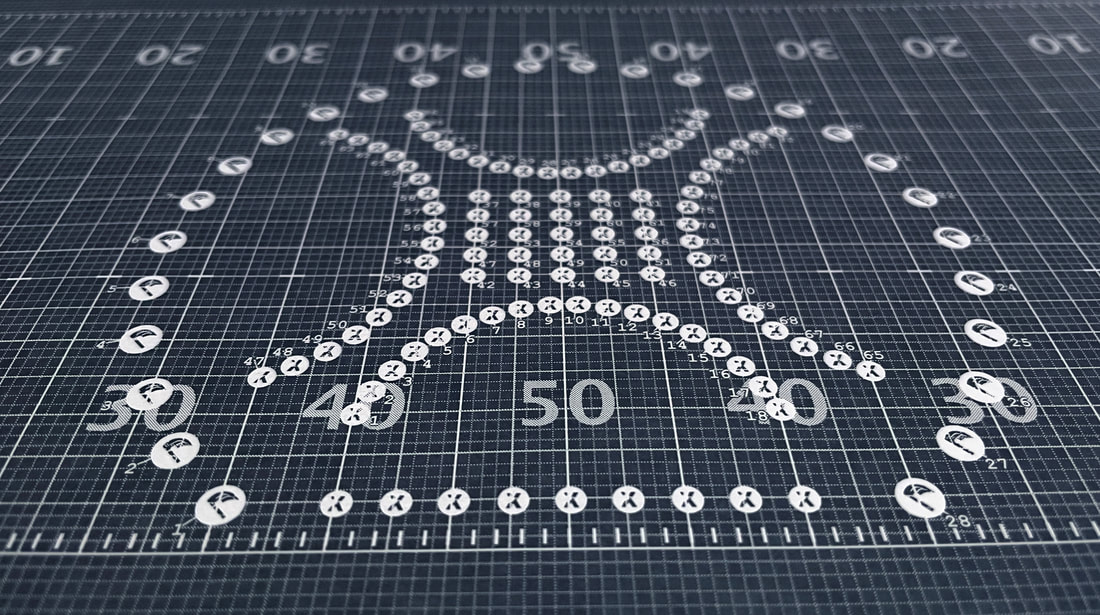
Drill Chart designed with Pyware
Conclusion: Where do we go now?
The evolution of drill design for marching band and drum corps reflects a continuous push for artistic excellence, technical innovation, and emotional storytelling. From its military origins to its current status as a blend of pageantry, theater, and athleticism, the activity has transformed into a breathtaking visual and musical spectacle.
As technology advances and designers seek new ways to engage audiences, the future of drill design promises even greater creativity, complexity, and emotional depth. Looking ahead, we can expect even more experimentation with staging, visual effects, and interdisciplinary influences. Whether through the seamless integration of props, enhanced storytelling, or entirely new staging techniques, one thing is certain...the evolution of marching band and drum corps drill design is far from over. Thanks for reading. If you or someone you know needs Custom Marching Band Drill Design for your band, please consider using me! DISCLAIMER Please note: I am not a copyright lawyer. I've done research into copyright for years, and have had conversations with copyright lawyers, but the law is always changing - sometimes even too fast for those who live in that world. Please take everything you read here with a large grain of salt, and always err on the side of caution. If you see something in this post that has been inadvertently misrepresented, please let me know and I will gladly edit or remove it. Copyright DefinedCopyright is the legal right granted to the creator of an original work, allowing them exclusive control over its use and distribution for a specified period of time. This right enables creators to benefit financially from their creations, fostering innovation and artistic expression. Copyright is just one form of intellectual property...other forms of include patents, trademarks, trade dress (the packaging and labeling of protected products, the layout of a particular restaurant), trade secrets (the formula of Coca-Cola, the KFC original recipe), industrial design rights, and plant breeder rights. For a work to be eligible for copyright protection, it must be "fixed in a tangible medium," meaning it must be recorded in some form, whether written, recorded, or otherwise captured. Importantly, copyright does not protect ideas, thoughts, or casual conversations - it only protects the expression of those ideas in a fixed form. Additionally, the work must be original and exhibit some level of creativity ( (in other words, you cannot copyright a work consisting of dry facts organized in a conventional way - this was tested in the courtroom when a phone company tried to copyright the phone book, and failed). Copyright Law in the USIn the United States, the first law governing intellectual rights was the Copyright Act of 1790, the stated object of which was to secure for authors the "sole right and liberty of printing, reprinting, publishing and vending" the copies of their creations. Thus, the main function of the Copyright Act of 1790 was to encourage creativity and the development of a national art, music, and literature – all important things in a country that was a mere child on the international stage, and had very little of the above. Ironically, the Act was copied almost verbatim from the "Statute of Anne," an English edict sometimes known as the Copyright Act of 1710, which is considered the world's first government-enforced protection for creators of content. The initial Act did not cover musical compositions. These were addressed in the Copyright Act of 1831, but until then, most musical compositions were registered as books. Until this law was passed, a creator of content had no legal recourse if someone stole their work. Any publisher or book seller - or anyone who owned a printing press - could simply run off copies of any book or sheet music they wanted, and make money from the creative efforts of others (denying those people an opportunity to benefit financially from their own creations). The Copyright Act of 1790 granted copyright protection to maps, charts, and books for a period of 14 years, with the right to renew for one additional 14-year term…if the copyright holder was still alive at the end of the first term, for a total of 28 years. The Copyright Act of 1831 revised that to 28 years plus an optional 14-year extension for a total of 42 years. The Copyright Act of 1909 revised that to 28 years plus an optional 28-year extension for a total of 56 years. The Copyright Act of 1976 revised that yet again, to “lifetime of the author plus 50 years.” And finally, the Copyright Term Extension Act of 1998 (sometimes referred to as the Sonny Bono act, or more derisively, the "Mickey Mouse Protection Act) revised that to “lifetime of the author plus 70 years” for general copyright, or 95 years from publication/120 years from creation (whichever comes first) for works-for-hire. One might well wonder why an author, composer, poet, or playwright would need a copyright of over 100 years, when the typical life expectancy of a human being is 74 years…the truth is, most of these copyright extensions were pursued not by individuals, but by corporations, some of which have lobbied hard to extend the law because their profits depend on keeping their “properties” under copyright. One company in particular has been lobbying for more and more copyright protection, including the possibility of a perpetual copyright that would never expire (which is ironic, since the bulk of their profits came from works that were in the Public Domain at the time)…you'll never guess who...  The Public DomainAfter the period of copyright exclusivity ends, the work is supposed to enter into the Public Domain, where it now belongs to everyone, and is free for all to use. As of the writing of this blog post, any work created in 1928 or prior is considered to be in the public domain. Some examples of public domain works include:
Music in the public domain can be reproduced, copied, or arranged without worrying about having to pay royalties. It is an open resource for arrangements and ideas for new works. Arranging anything based on the music of Classical or Romantic composers is fair game. Even some really great works from the early 20th Century are considered to be in the public domain (though you should always double check). Be careful to use only the original public domain works if you want to arrange them or use them in some fashion. For example: Bizet's "Carmen" is in the public domain…but if you were to arrange the Yo Goto version of Carmen (for wind band), you would be infringing on the derivative rights of the arranger (Goto), even though the original work itself is public domain. Securing CopyrightIn the world of marching bands and show choirs (the two most frequent "abusers" of copyright), many directors purchase stock music arrangements because they are inexpensive (and incur no further licensing costs), though sometimes directors may wish for customized arrangements, which require a few extra steps… If you want to use a copyrighted piece of music in your marching band show or indoor routine, then you need to secure permission via an arrangement license. Technically speaking, even adding new drum parts to an already existing marching band arrangement, or adding instruments to an a cappella choral work, would require an arrangement license. However, this is one of those grey areas that most rights holders seem to overlook or ignore. Entities such as DCI, WGI, and BOA will check the status of your permissions when entering major regional competitions. Often, you must have not only permission to arrange, but also mechanical and synchronization permissions. State-sponsored organizations and contests are somewhat more lenient about checking to see if you have secured the proper copyrights…but more and more of them are beginning to check more rigorously to avoid culpability. The process for requesting permission varies from publisher to publisher, with some taking as little as a minute to grant permission via an automated process, and some taking up to six months to grant (or deny) permission to arrange! Some services also have a pre-cleared list of tunes that are immediately licensed.  Billy Joel is down to have you arrange any of his music... There are also some companies that will take care of the process for you...for a fee. Some publishers insist that you go through one of these "middle men," but if you are looking to save money and have some extra time for research, you can often contact a publisher, estate, or rights holder directly and secure a proper license through them. John Mackey is a good example of a composer who handles his own copyright permissions...all you have to do is contact him instead of going through a third party company, who is going to charge you an extra fee. Costs are going to vary wildly, depending on the publisher, the artist, the size of your group, and the intended use of the arrangement. Some licenses cost as little as $100, and some can cost as much as several thousands for a single work. In general, you should expect to pay between $200 and $500 per chart or song. If you are creating a medley, costs will be higher. Take heed, though: Some composers and/or rights holders will NOT give permission for some or all of their music. Examples of this include John Williams, David Maslanka, Thomas Newman, Charles Ives, Vincent Persichetti, all Nintendo music, much Disney music, and several others…BOA used to keep a list of all music that was likely to be denied, called the "Do Not Arrange" list...they don't seem to keep that list anymore. 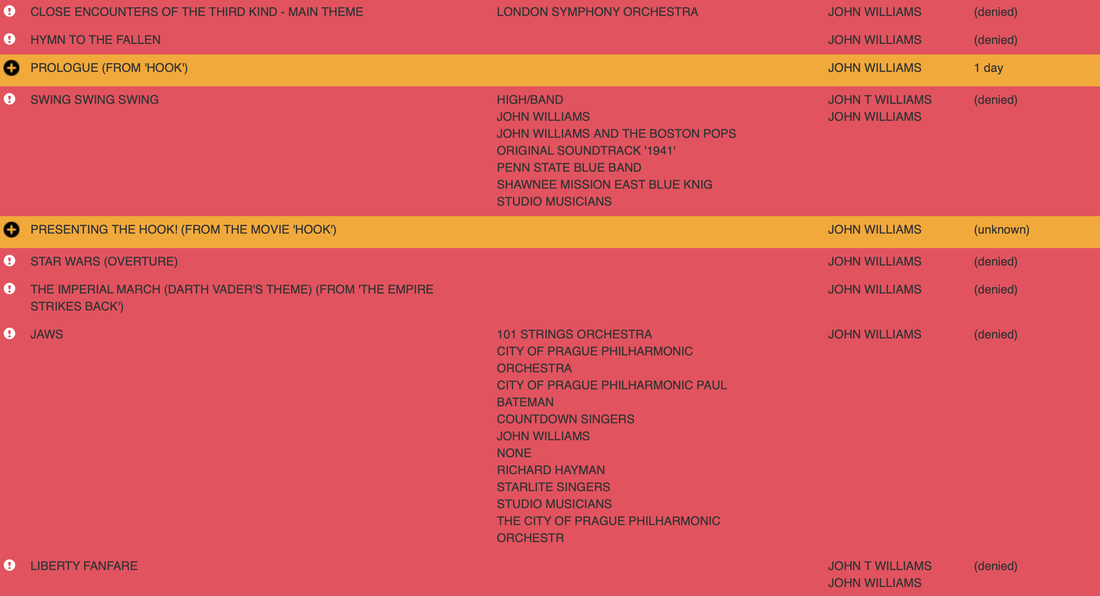 John Williams could not be more clear about his desire for you not to use his music for marching band... As a bit of a personal anecdote...a few decades ago I had a conversation with the composer Ron Nelson about his piece Rocky Point Holiday. Near the end of the conversation, I couldn't resist asking him about the drum corps "urban legend" that he had sued the Garfield Cadets for infringement in the early 1980s. While he played coy about the details, he did recount to me that he happened to be watching DCI Finals on PBS when he heard a "mashup" of Bernstein's Mass and his own Rocky Point Holiday. Since had never been asked permission to use the tune, he was annoyed, and let it be known through his lawyer. He told me that from that point on, to discourage corps from using his music, he decided to charge an "exorbitant" fee (which I believe I remember was $1500 at the time...seems rather quaint today). He said that no one bothered him with an arrangement permission request until 1991, when the Blue Knights happily paid the fee for "Savannah River Holiday." He gave up on trying to restrict his music after that. In any case, the result of not following proper procedure can result in a lawsuit against you personally, the ensemble or school you work for, or BOTH. There are cases that have resulted in fines of thousands of dollars, and directors have lost their employment. New music is the result of ensembles purchasing and performing published works and properly following copyright laws. If we want to see the continued development of great works, we must continue to respect the process. 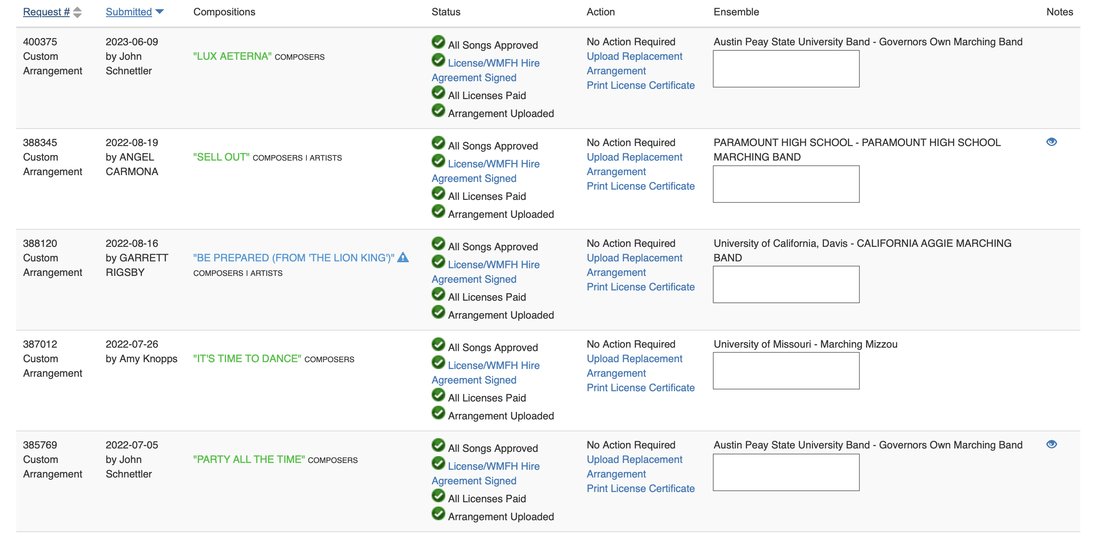 Due diligence... Fair Use“Fair Use” is by far one of the most misunderstood concepts involved in copyright. Fair use is determined using the following criteria:
These criteria were intentionally left vague by Congress to allow for flexibility in the face of new technologies yet to come. But when ordinary users cannot determine whether a proposed use is fair, rights holders are able to assert that ANY use would constitute infringement, which is not how the law was intended to function. According to Jason Mazzone, law professor at the University of Illinois, while the law intended to set a minimum amount of copying as fair use, many rights holders have decided to use this as a maximum fair use ceiling. The result of this is that fair use is being unfairly (and illegally) constrained instead of encouraged. The very vagueness in the law that allows for flexibility also leaves room for aggressive overreach on the part of corporations and publishers. How often have you read the notice “Any photocopying of this publication is illegal” or “permission for duplication, for any purpose, must be secured from the copyright owner?” This is the publishing industry’s boilerplate attempt to limit ALL copying, fair or not. It is also not true, as the guidelines from Congress have laid out several instances where copying is allowed. If the Music Publishers Association’s position were the actual law, then there would be no such thing as Fair Use. The whole purpose of Fair Use is to be able to use works without obtaining permission beforehand. What you CAN do...
What you CANNOT do...
As I said at the very start - I am not a lawyer. I've done my best to give accurate information, but none of the above should be considered legal advice. I may not be a lawyer, but I AM a music arranger...and if you are in need of custom music arrangements, public domain or otherwise, I am always happy to put my skills to use.
A few weeks ago, I was invited to share my insights on arranging music for marching bands with a Marching Band Techniques class at Western Illinois University. Reflecting on the evolution in my style over the past 25 years, I decided to summarize my presentation into a blog post, figuring that it might be of interest to others, so...here's a bit of a deep dive into the art - and science - of arranging music for marching bands. The specific example I used in my lecture was my arrangement of the Smashing Pumpkins' 1996 hit, "Tonight, Tonight." It's a song I've always enjoyed, making the arrangement process a pleasure rather than a chore. Arranging music you like can significantly enhance your work quality and enjoyment. Even though I take on all kinds of projects, there's a special joy in working on tunes you can listen to repeatedly. If you don't know the tune, take a moment to listen to it - you may find that you've heard it before, though you may not have known its name or who performed it: "Tonight, Tonight," from the album Mellon Collie and the Infinite Sadness THE FOUNDATION: LISTENING and TRANSCRIBING When arranging, especially without a provided score or lead sheet, the process begins by listening to the original tune multiple times to capture the correct melody, rhythms, and harmonies. From teaching courses on orchestration for years, I'm well aware that MIDI versions of many pop and rock songs can be found online, and that many student arrangers are drawn to using these because it cuts down on the amount of work. Unfortunately, this also robs students of an opportunity to use their ears critically, an invaluable skill in arranging. I myself prefer working from a reliable score/lead sheet or directly transcribing by ear to avoid inaccuracies - too often I've seen MIDI files that have contained numerous errors in rhythm, harmony, and sometimes even the melody itself! For tricky sections, especially in faster music, I will sometimes use software like Amazing Slowdowner, which allows me to slow down the music without altering the pitch. This helps in catching any complex rhythms or pitches I might miss at full speed. Sometimes, I'll also adjust the pitch to better fit the desired key for the arrangement. After thoroughly familiarizing myself with the tune, I begin inputting the melody into Finale, sometimes using the piano* for help with complex passages or harmonies. I then create a 5-line sketch of the arrangement. This sketch helps streamline the structure (see below), especially when dealing with longer songs that need to be condensed into a 1:30 to 2:00 marching band arrangement. *I recently had to use the piano for an arrangement of a fun-but-silly tune by Thank You Scientist, which had very complex and rapid passages in the middle section. Here is how that one turned out, in case you're curious. SELECTING YOUR STRUCTURE One of the trickiest parts of arranging pop or rock music for marching bands is deciding which sections to cut. Pop and rock songs are famous for their catchy repeated verses, choruses, and hooks, but that repetition doesn't translate well to marching band performances, especially when the original song is longer than two minutes. Here is where my own biases come into play: While I have certainly enjoyed arrangements that present a very different "take" on the music being arranged, when it comes to rock and pop music, my preference is to stay as faithful to the original as I can. These types of arrangements are typically not used in competitive marching band shows (although there are plenty of examples of successful uses of pop/rock music in BOA-type shows), but are most often presented by bands seeking to entertain a football crowd on Friday nights. A conversation I once had with a well-meaning (but somewhat blunt) football dad convinced me that arrangers sometimes outthink themselves when it comes to arranging pop and rock music. Most of the time, the audience simply wants to be able to recognise the song being performed. My high school band was performing an arrangement that took various wild liberties with the music. It was not well-received by the 99% football crowd. I guess the previous two paragraphs can be summarized by saying: Know your audience. Typically, I approach the topic of song structure by first identifying each section. I try to always use the song's intro, especially if it's short and impactful. Repeated verses are usually presented just once, or at most twice if the song's structure really demands it. Choruses are included once or twice, but other song structures like breaks or interludes (think of those classic 1980s guitar solos) are often left out, though they can sometimes be used to great effect if you have a wind soloist that is capable, or even a guitar or keyboard player in the pit. Refrains and bridges are used on a case-by-case basis. Remember, most marching band arrangements need to fit within a 1:30 to 2:00 timeframe, so significant editing will often be necessary, especially for longer songs like "Tonight, Tonight." To create a cohesive arrangement, I start with a 5-line sketch that includes the song's intro, a verse or two, a chorus or two, and a coda or ending. This process can be challenging, especially with 1980s music where many songs end with fades that don't work in a marching band context. My sketches typically contain two treble clef lines, two bass clef lines, and a basic drumset part. This helps me think about the rhythmic elements and how to incorporate drum parts later on. Here is a glimpse into my initial sketch for "Tonight, Tonight": Initial 5-line Sketch, "Tonight, Tonight" As you can see/hear, I ended up cutting out a few of the more repetitive sections, though I knew right away I wanted to use that arpeggiated guitar lick that starts at 0:38 in the original...but how best to do it? And for that matter, how can we get the majestic full sound of the introduction, while also musically portraying the softer verses? This is where orchestration enters the picture. THE ART OF ORCHESTRATION Orchestration is crucial for a compelling arrangement. Understanding what each instrument can and cannot do, and where they sound best, is essential. Early in my career, much of this was trial and error for me, but now I rely on a solid grasp of instrument capabilities. This was not always the case...I still keep a handful of arrangements I did early in my career that I keep as a reminder to myself of how much I've learned (one chart in particular had 3 different flute parts, 3 different clarinet parts, 3 alto sax parts, 2 tenor sax parts, 3 mellophone parts, and also featured intricate rhythms that would be near impossible to clean for use on a marching field). Since then, I've found more success employing the "less-is-more" philosophy of instrumentation. Unless you've got a huge, huge band with tons of woodwinds, it doesn't make a lot of sense to split parts that much. Most music you arrange is going to have only 4-6 different things happening at once (unless of course you are arranging Rite of Spring). Here’s a typical breakdown I use for marching band instrumentation:
Successful combinations include Alto Saxes with Mellophones, Tenor Saxes with Trombones, Tenor Saxes with Baritones, Trumpets and Flutes/Piccolos, Trumpets and Alto Saxes, Clarinets and Mellophones, Clarinets and Baritones, and many more, depending on the colour you want from the group. Each combination needs careful consideration of their roles and dynamics to ensure a balanced sound. One way you can learn about this is by studying other arrangers' work. From the great Tom Wallace (you've no doubt played some of his charts...he is also the staff arranger for the University of Georgia Redcoat Marching Band) I learned to use the trombones/baritones as a harmonic foundation. His arrangements feature lush, 3- and 4-part harmony using the low brass that is just hard to beat. From Jay Bocook I learned how to use the woodwinds in a way that will ensure they are heard. From Jay Dawson I learned how to add to a melody so that the end result is that the melody is heard more prominently...even when you haven't changed anything about it by itself. And from myriad great arrangers out there, I learned about using middle voices for acrobatic countermelodies. If you're not familiar with instrument ranges and tessituras, I highly suggest taking an orchestration or instrumentation course (if you're still in college), or picking up a book on those topics. For me, discovering Kennan's/Grantham's "The Technique of Orchestration" in college was a game-changer. I read it cover-to-cover, and it helped me truly understand the ranges of the instruments, where they sound great, how best to combine them, etc. Definitely worth picking up (especially if you can find an earlier edition that doesn't cost as much as the later ones). Using notation software (Finale, in my case), I set up a template that includes the layout I prefer, my preferred fonts, my preferred expressions and articulations, and the correct playback sounds for each instrument (I use NotePerformer for my wind instrument sounds, and Virtual Drumline for the percussion sounds). The template allows me to work quickly during the summer months, when I might have a slew of music to arrange...not having to start from scratch with every project is a time-saver. 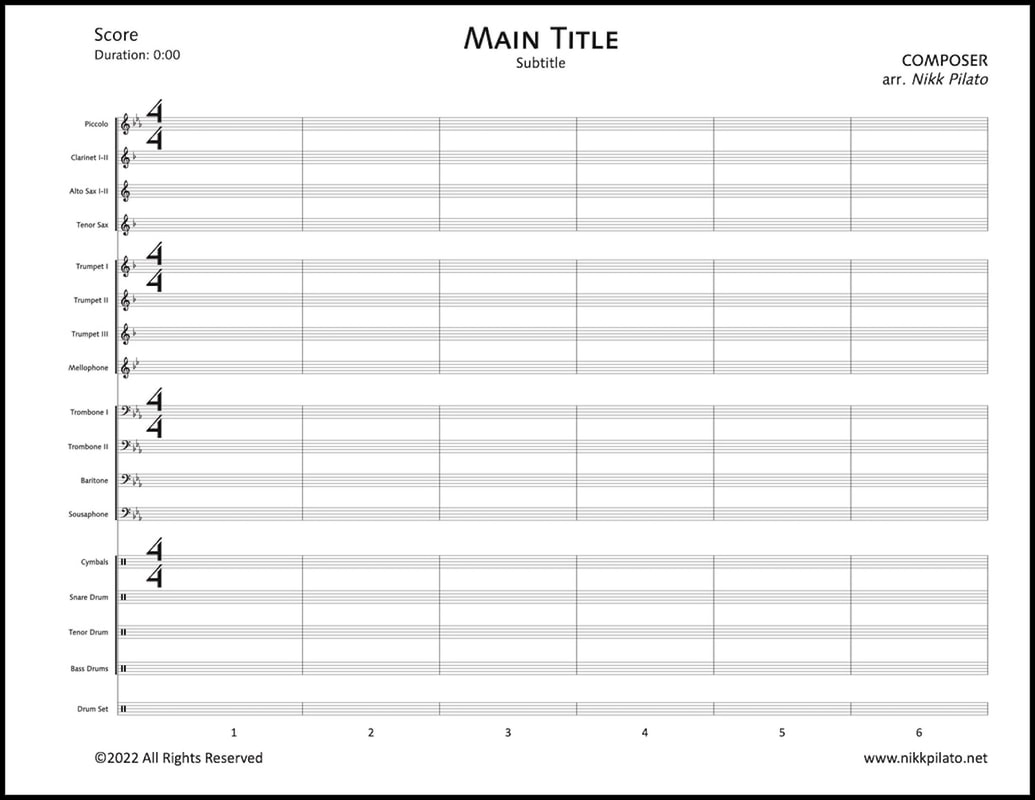 My current template for marching band arrangements After my sketch is complete, I will start orchestrating it. The introduction of the original song is loud and full, the usual guitar, bass guitar, and drums augmented by strings. This allows me to use all the voices tutti for a strong initial impression right off the bat. (A word about the percussion: I am not a percussionist. I've been teaching myself how to write for a battery section, but it will never be fluid for me...still, I enjoy creating these parts and trying to make them as playable as possible, because there are bands out there that can't afford to hire a drumline arranger. I expect that most people who would purchase one of my arrangements would indeed have someone that would write their own parts - or at least mercilessly edit mine) Introduction Moving on from the introduction, we come to the verses. As I said earlier, I knew I wanted to use the arpeggiated guitar riff, so I decided to use it as an alternating motive between clarinets + mellophone and piccolo/flute + alto sax. I also included cues in the trumpet, just in case. Billy Corgan's voice lends itself well to the low brass, so that's where I put most of the melody from the verses (also, because I am using upper voices to replicate the guitar riff): Verse 1 I do repeat the verse in my arrangement, with a slightly modified conclusion the second time around, then I hit the ending riff, where several things are happening at once...I liked the chaotic feel of this section of the song. I knew I wanted to replicate the ending, which has a very classic 80s/90s soft ending aesthetic, but I realised it would be difficult to orchestrate...unless I did it as a solo with only partial woodwind accompaniment, at least until the solid power chords at the end. My students at ISU were fond of waving "fake lighters" in the air, like you'd often see from concert audiences in the 80s and 90s, which always made me chuckle. Coda/Ending Section There were tweaks after I completed it, to be sure. One of the healthier habits I've gotten into is to set aside a finished arrangement for at least 24 hours, so I can come back to it with fresh eyes and ears. Doing this has saved me from making silly mistakes, and more than a few times has also allowed a new orchestrational idea to percolate during my down time, helping me to improve the arrangement. I highly recommend this strategy to anyone who is writing any sort of arrangement. Since I've given you examples of my process and used the actual Finale playback for them, a note of caution about these types of playback files: Notation programs play back everything with mechanical precision. They will "overcome" your mistakes - for example, if you write a flute part in the bottom part of the staff and expect to hear it on the field, you better have them amplified, or have no one else playing (even then, you may not hear them!) However, a notation program will play it back and it will be audible, fooling you into thinking that all is well. This is where your "inner ear" becomes indispensable. Full finished arrangement DEVELOPING YOUR INNER EAR Developing the ability to audiate, or hear the music internally, helps you anticipate how combinations of instruments will sound in different ranges and dynamics. It will also help you avoid balance issues like the ones described above. The more you practice audiating, the better your ear will get. After some time, you will start to "hear" what combinations of instruments sound like, how they work in whatever range you are trying to write them in, whether or not they will be muddy or sharp, clear or obscured, loud or soft, etc. All without the need to have the software play it back for you. Try this right now...think of a trumpet's sound. "Picture" them playing a note, any note, at a mezzo forte level. Can you hear that note in your head? Can you hear it crescendo, then decrescendo? Can you hear it articulating a staccato, a marcato, a martellato? Now...add an alto saxophone to this sound, playing in unison with the trumpet. Can you hear the combination of their sounds? Can you hear them play four quarter notes together? Test yourself by adding other instruments, or different combinations. If you find that easy, try hearing a trumpet playing a simple melody, while a mellophone plays the harmony a third below...if you found that difficult, that's ok. Audiation is a skill that has to be practiced and honed, like any other musical skill. If you want to be a conductor of any kind, it is also a skill you will find indispensable when it comes to score study and rehearsing an ensemble...might as well get a head start now! FINAL THOUGHTS
Arranging music for marching bands combines technical skills with creative artistry. Whether you're cutting sections to fit time constraints or carefully choosing instrument combinations, each step requires attention to detail and a deep understanding of both the music and the ensemble. By embracing these principles and continually honing your skills, you can create engaging and memorable marching band arrangements. Got a specific question? Feel free to comment below, and I'll do my best to check in and answer. Remember, the ultimate goal is to bring the music to life in a way that resonates with both the performers and the audience. Happy arranging! - - - If you are interested in purchasing the arrangement discussed in this post, or any other arrangement, please visit this page. If you are in need of a custom arrangement, I am happy to help there too! Contact me for details. INTRODUCTION Playing with good intonation in an ensemble setting is a performance skill. It must be practiced diligently, just as you would practice scales, sight-reading, multiple tonguing, etc. Unfortunately, few of us practice “being in tune,” either because of an ignorance of its importance, or because of confusion on how best to proceed. The result is that over the course of a typical rehearsal, numerous unison lines remain out of tune, chords do not “ring true,” and performers do not get the best possible sound out of their instruments. 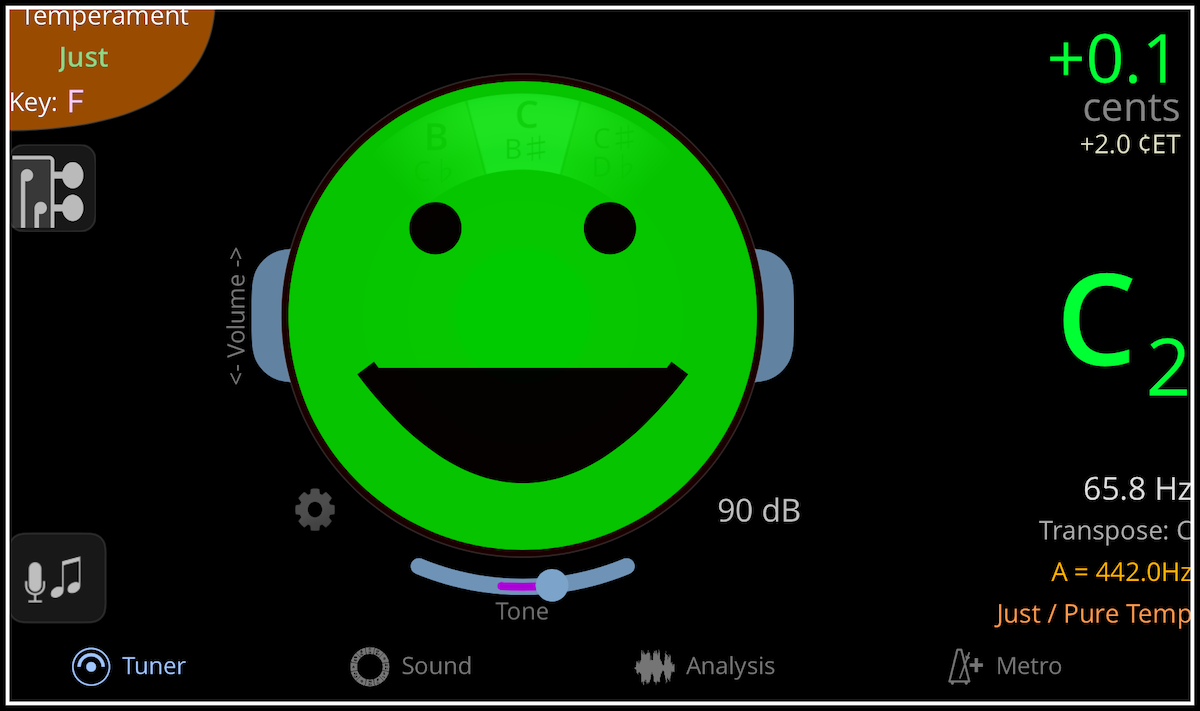 Good intonation presupposes two ideas:
This entry will offer suggestions for training and improvement on both counts. As with anything else I ever post here, the subject material is drawn from myriad sources, including published research, colleague and mentor/teacher opinions, and experience conducting ensembles for the past twenty-five years. There is also a wealth of information to be found on YouTube - provided you can adequately sift through the information to find the important nuggets. However, this is not intended to be "the final word" regarding intonation - if you have anything to contribute, be it a correction, an emendation, or an addition, please don't be shy about replying and/or emailing me. I've been studying intonation for a long time, but will never fully master all there is to learn, and am always open to new ideas and opinions. FACTORS THAT CAUSE POOR INTONATION It is important to understand why poor intonation is so prevalent. The following areas of concern can cause poor intonation by themselves, though they are (unfortunately) usually paired with other factors: The Instrument/The Mouthpiece
 Dents in instruments cause intonation issues Basic Playing Procedures
Not Playing in the Standard Tuning Frequency
Insufficient Warm-up Time
Psychological/Musical Phenomena
 Not a great idea for being in tune in an ensemble setting... Pitch Tendencies of Instruments and Performers
THE TUNING PROCESS With the exception of oboes and bassoons, wind instruments are manufactured to play sharp when the headpiece, tuning joints, or slides are closed/pushed in. Therefore, players must lengthen their instrument by pulling out the main tuning mechanism, whatever it is for that instrument. When tuning in an ensemble setting, the following basic procedures should be followed by all wind players:
THE HARMONIC SERIES The Harmonic Series is a naturally occurring (i.e., not man-made) acoustic and mathematical phenomenon that is the underlying foundation for the construction of sound on string, woodwind, and brass instruments. The series consists of frequencies (pitches) that are related to each other via whole number ratios of the lowest possible frequency, which is known as the fundamental. For example, if the fundamental was 10Hz, then 20Hz (2xF), 30Hz (3xF), 50Hz (5xF), and 100 Hz (10xF), would allbe harmonic frequencies of the fundamental. 55 Hz would not be a part of the harmonic series, because it is not a whole number ratio to the fundamental (5.5xF). 55Hz would, however, be a part of the harmonic series if the fundamental were 11Hz. These frequencies, known as harmonics, are possible because of complex vibrations. All freely vibrating bodies (such as a piano string or an air column) vibrate not just along their entire length, but also in halves, thirds, fourths, etc., theoretically onward into infinity. The smaller each segment of string (or air column) vibrates, the higher the frequency (pitch) produced above its fundamental, hence the name we often use synonymously with harmonics: overtones. Many of these overtones are inaudible to the human ear (just as many of the secondary vibrations are invisible to the eye). The lower the note played, the more obvious the overtones to our ears. This is why low notes on the piano, for example, tend to have such a vibrant and rich quality (try it out next time you are in a practice room...strike the lowest keys on the piano and strive to listen for the audible harmonics, particularly the fifth and the third of the fundamental). As we progress up the Harmonic Series, the intervals between overtones get smaller and smaller (and some are not even intervals that we use in Western music). Any sound we hear contains all the notes in its harmonic series to varying degrees. That variability is the reason that instruments playing the same pitch sound different: Their harmonics have different strengths. For example, an oboe playing A440 has a rich, reedy, spicy sound, while a clarinet playing the same note has a much less vibrant tone, simply because the clarinet’s construction suppresses some of the overtones (the 2nd, 4th, and 6th especially) that would make it stand out more. No matter how many overtones are present and audible, our ears tend to resolve all harmonically-related frequency components into a single sensation. Rather than perceiving all of the individual harmonics of a musical tone, we perceive them together as one pitch (the lowest one, or fundamental). Incredibly, this will happen if we hear just a few tones from the harmonic series…even if the fundamental is not actually sounding! This phenomenon is used in music recording, especially in low bass tones that are to be reproduced on small speakers such as earbuds or other headphones, and it fools your brain completely into thinking that the lowest tone is there, when in fact it is not. Yet another name often applied to the phenomenon of the harmonic series is partials. This is especially the case when speaking of the harmonic series in relation to brass instruments. For all intents and purposes, the terms harmonics, overtones, and partials are all interchangeable in this document. For brass players, these partials are particularly important, as they are the foundation to playing chromatically. Here are the first sixteen partials of the harmonic series (keep in mind that these partials go on, theoretically, into infinity):
If you were paying attention, you may have noticed that the first six partials of the harmonic series make up a Major Chord. In fact, many historians and theoreticians believe that the reason our harmony tends to be so heavily reliant on fifths, fourths, and thirds (i.e., major and minor chords) is because those are the most audible harmonics to the human ear. (This does not, however, explain why Asian and Arabic cultures use different harmonic models since they too would be able to hear the same harmonics as Western Europeans during the development of music). Here are some other tips/tricks that will help you learn harmonics/partials:
So why is any of this important to you? Well, knowledge of the harmonic series is how fingerings on brass, woodwind, and stringed instruments are derived. This knowledge could help you devise alternate fingerings for a troublesome spot, or decide a different way to voice a chord so that it sounds better in tune. But really, it is important to know because it is what music is all about, and knowledge for the sake of knowledge is still important. Knowing what we know now, we can see that the pitch “G,” for example, can be:
= = = “Every bit of playing we do today, be it good, bad, or indifferent, goes toward deciding what sort of player we will be tomorrow. A player who begins his day with a load of thoughtless, shoddy flourishes is simply perfecting their faults. Time spent trying to do simple things well is like putting money in the bank. Use your warmup time to do simple things well.” – John Fletcher |
MeMusician. Educator. Conductor. Archives
April 2025
Categories |


 RSS Feed